Overview
Single Sign-On (SSO) is an authentication service that enables users to access multiple applications with a single set of login credentials, such as a username and password.
This streamlined process enhances user convenience and security by reducing the need for multiple logins across various platforms. SSO can be great for productivity, IT monitoring and management and security control.
The Cloudmore platform supports Single Sign-On (SSO) using SAML 2.0 protocol, allowing Cloud Broker administrators to log into Cloudmore using the authentication protocol in their own system. Once authenticated, the user does not need to re-enter details to log into Cloudmore.
Configuration for Cloud Service Brokers
Prerequisites
To configure Single Sign-On (SSO) for Cloud Service Brokers, the following prerequisites must be met:
-
The Cloud Broker must have a fully functional Identity Provider (IdP) system that supports the SAML 2.0 protocol.
-
The Cloud Broker will then need to input their IdP system’s metadata into the Cloudmore platform.
-
Cloudmore will provide the Cloud Broker with Service Provider metadata, which must be entered into the IdP system.
-
The SSO feature must be enabled within the Cloudmore Security Center.
Configuration Steps
To enable Single Sign-On (SSO), please follow these steps:
-
Access the Security Center
Navigate to the Security Center page under the Broker menu in the Cloudmore interface. -
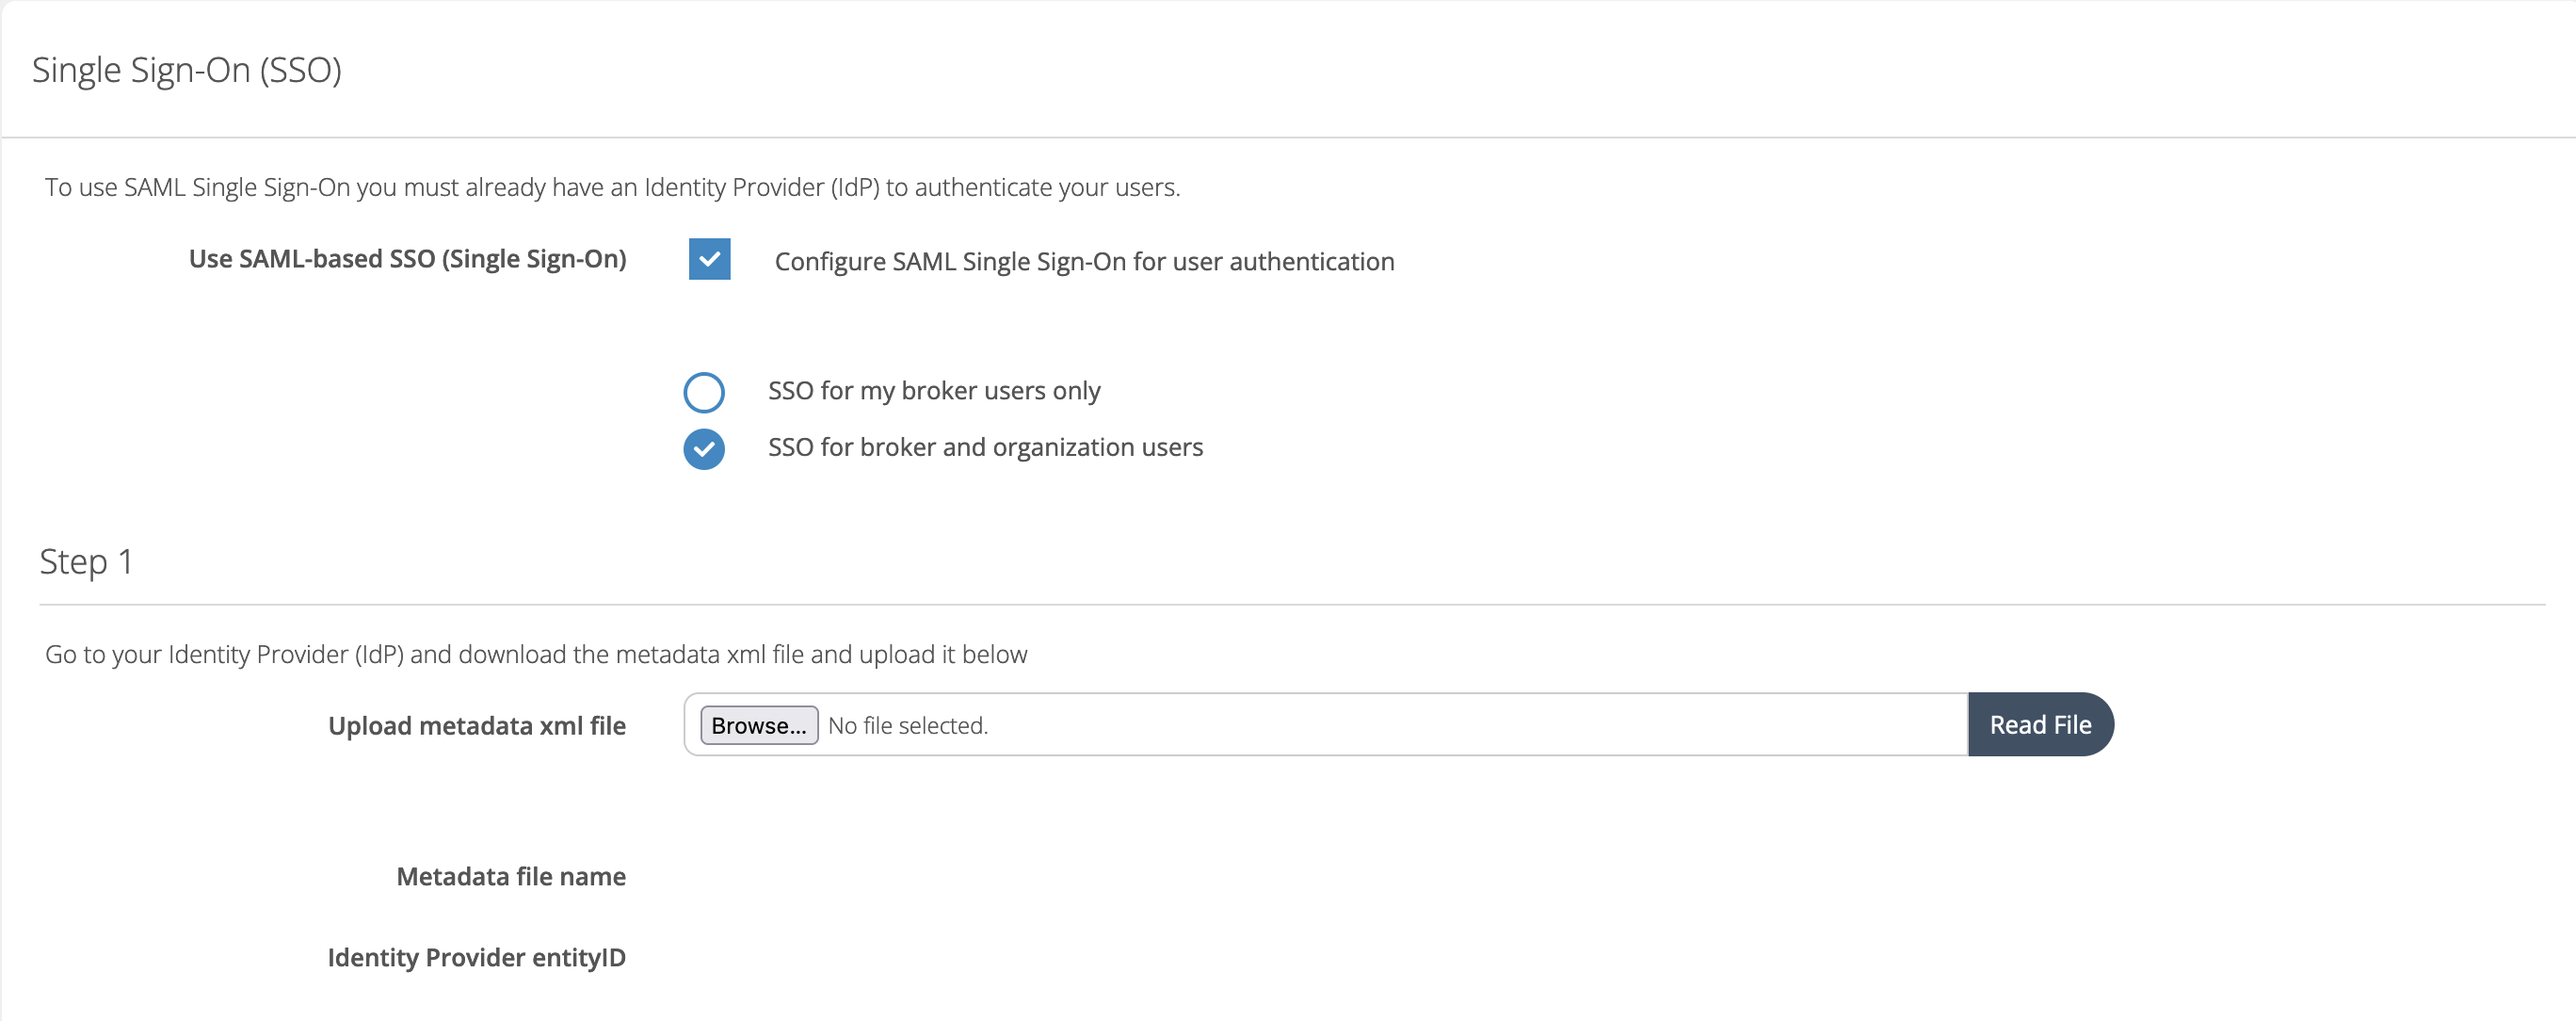
Enable SSO
Select the checkbox labeled Use SAML-based SSO (Single Sign-On). You may choose to enable this feature for broker users only or for both broker and organization users, depending on your requirements. -
Upload Identity Provider Metadata (Step 1)
-
Download the metadata XML file from your Identity Provider (IdP) system.
-
Upload the downloaded metadata file into Cloudmore. The metadata file name and the IdP system’s entityID will be automatically populated.
-
-
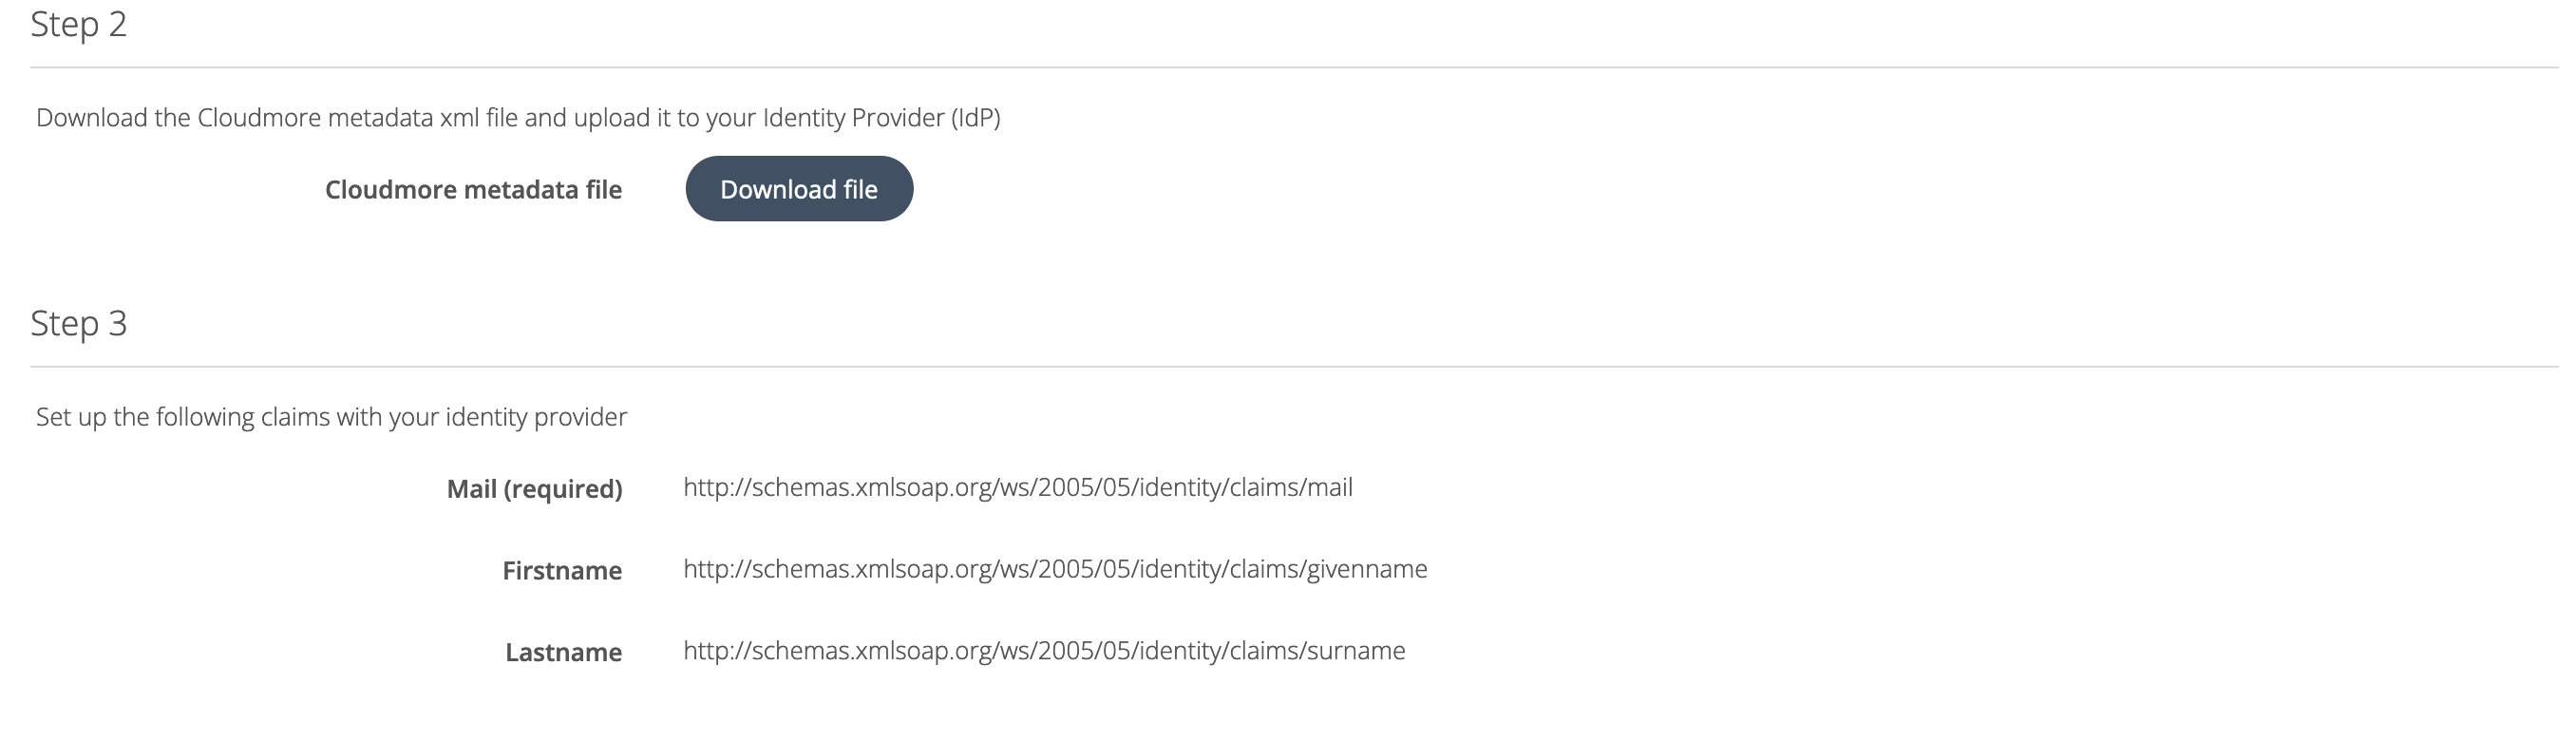
Download Cloudmore Metadata (Step 2)
Download the Cloudmore metadata file from the provided link. This is required for configuration with your IdP system. -
Map Identity Attributes (Step 3)
In your IdP system, ensure that the Mail, First Name, and Last Name attributes are correctly mapped to the corresponding values in your IdP system.
By completing these steps, the SSO integration between Cloudmore and your Identity Provider (IdP) will be successfully configured.
-
To use Single Sign-On (SSO), administrators must have an existing user account in Cloudmore. This account is utilized to map the federated user to the corresponding Cloudmore account, which in turn governs the user’s access permissions and rights within the platform. For security reasons, accounts are not automatically created during login.
-
The federated user is matched to their Cloudmore account based on the mail attribute. This attribute must be unique and must be included in the authentication response from the Identity Provider (IdP).
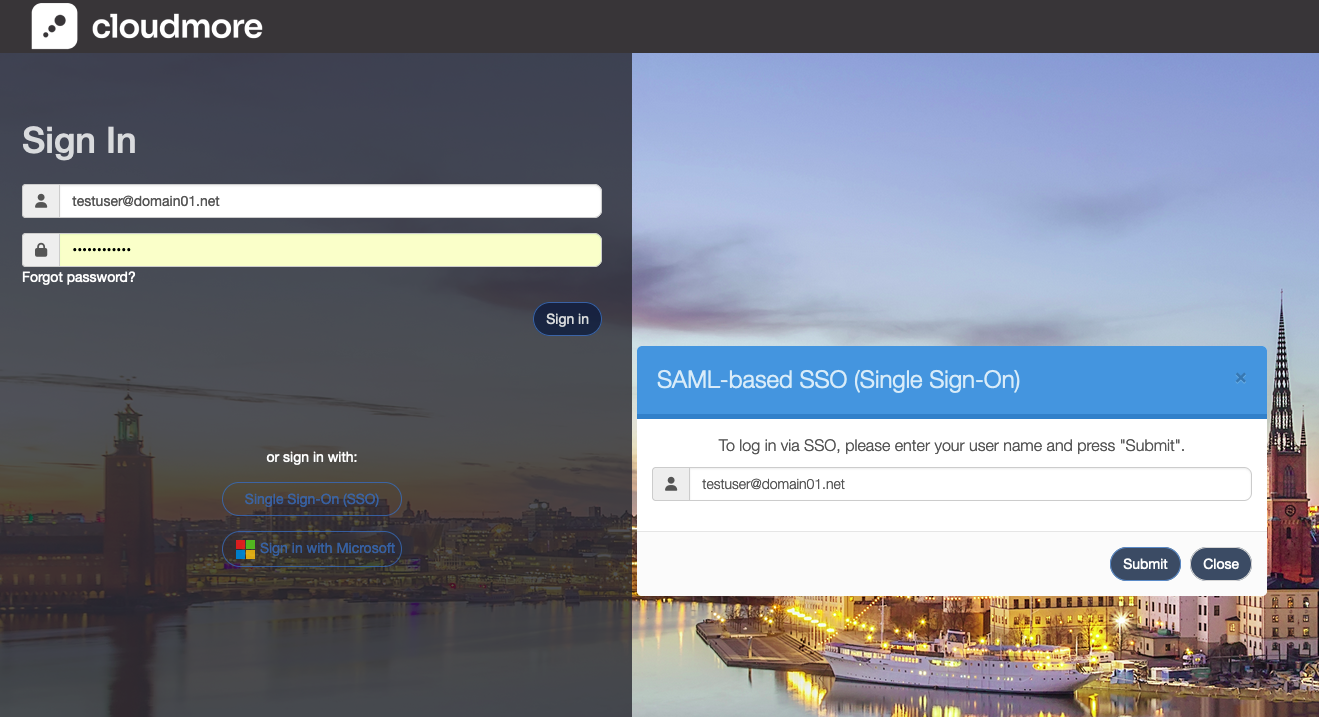
Once the configuration is complete, a user can initiate the SSO authentication on their login page using the ‘Single Sign-On (SSO)’ option.
Automatic Login
To automate the login process and trigger SSO authentication from an external system, you can specify the Identity Provider (IdP) directly in the URL. This approach allows users to bypass the standard login page entirely and, if already authenticated, gain direct access to Cloudmore.
Before proceeding, ensure that SSO is properly set up and functional. To use this feature, update the following URL by replacing <Branded_URL> with the URL you use to access Cloudmore, and <URL_to_the_IdP> with the URL of your Identity Provider.
Example URL format
https://<Branded_URL>/Shibboleth.sso/Login?entityID=<URL_to_the_IdP>
Example
https://www.brokerdomain.com/Shibboleth.sso/Login?entityID=https://sts.windows.net/00000000-0000-0000-0000-000000
This method ensures a seamless SSO experience by allowing users to authenticate directly through the specified IdP.
Okta Settings
When configuring SAML-based SSO with Okta, you must configure the attribute mappings correctly.
In Okta, add a new attribute statement with the following values:
-
Name: http://schemas.xmlsoap.org/ws/2005/05/identity/claims/mail|
-
Name format: Unspecified
-
Value: Select user.mail from the dropdown list
This ensures that the user’s email address is sent as the SAML claim and can be matched to the Cloudmore user account.