Integrate Cloudmore with Datto Autotask
Overview
After setting up the Cloudmore broker account and importing Datto Autotask companies as organizations, add the Datto Autotask service from the Marketplace to enable automatic integration.
Prerequisites
Disable any prior third‑party billing sync integrations with Autotask if you do not want duplicate billing integrations syncing data.
An API Integration Code which can be obtained from Cloudmore.
A Datto Autotask API user account with credentials. Refer to the steps here. Select “Cloudmore – CSP Automation" as the Integration Vendor.
Access to Autotask REST API Explorer for retrieving IDs. The Datto Autotask API user account can be used to login.
Add a user defined field in Autotask
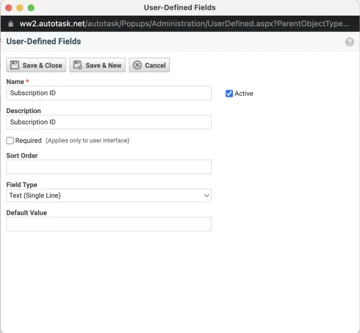
Add a User-Defined Field to contracts so Cloudmore can store the Microsoft identifiers for matching subscriptions to contracts.
Log in to the Autotask portal.
Go to Menu > Admin > Features & Settings > Application-wide (Shared) Features > User-Defined Fields > Contracts (TAB).
In the Name field, type "Subscription ID".
In the Description field, type "Subscription ID".
In the Field Type field, select “Text (Single Line)”
Click Save & Close.
Obtain IDs using Autotask REST API Explorer
Access the Autotask REST API Explorer to query and retrieve the required IDs for Service Billing Code, Product Billing Code, and Service Level Agreement which will be exported to Autotask in the billing sync.
Access the Autotask REST API Explorer homepage.
Click Show Credentials.
Enter the credentials of the API user account.
Click Save.
Click Explore.
For Service Billing Code ID and Product Billing Code ID
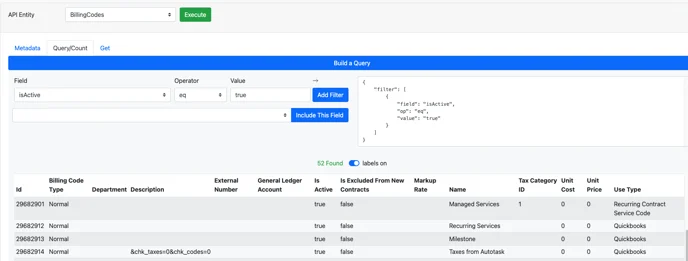
Select BillingCodes under API Entity.
Click the Query/Count tab.
Under Field, select Active and type True under Value. Click Add filter.
Click Execute
For Service Billing Code ID
Review the Use Type column and identify a line with Recurring Contract Service Code. Copy the ID value for that specific line you would like to use. This value is used when creating services in Autotask. Cloudmore does not currently create services but may support it in the future.
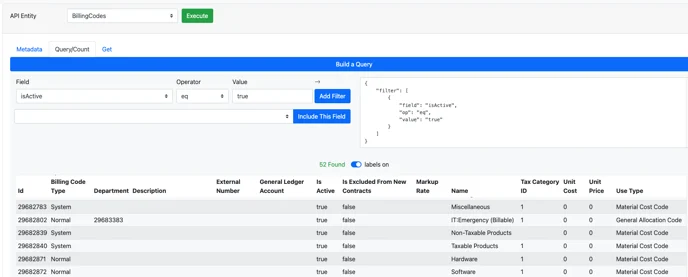
For Product Billing Code ID:
Review the Use Type column and identify lines with Material Cost Code or Product. Select the product billing code you would like to be used when creating a product and copy the ID for the identified lines.
For Service Level Agreement ID
Select Contracts under API Entity.
Across the serviceLevelAgreementID row, note any one of the values under Picklist Values column you would like to use if services are to be used.
Add the Datto-Autotask Service in Cloudmore
Log in to the Cloudmore broker account.
Click Marketplace in the left navigation.
Search for Datto Autotask (with Vendor: Autotask) and open the listing.
Click Add Service.
For Target audience, select Global (available to all organizations) or Restricted (available to certain organizations).
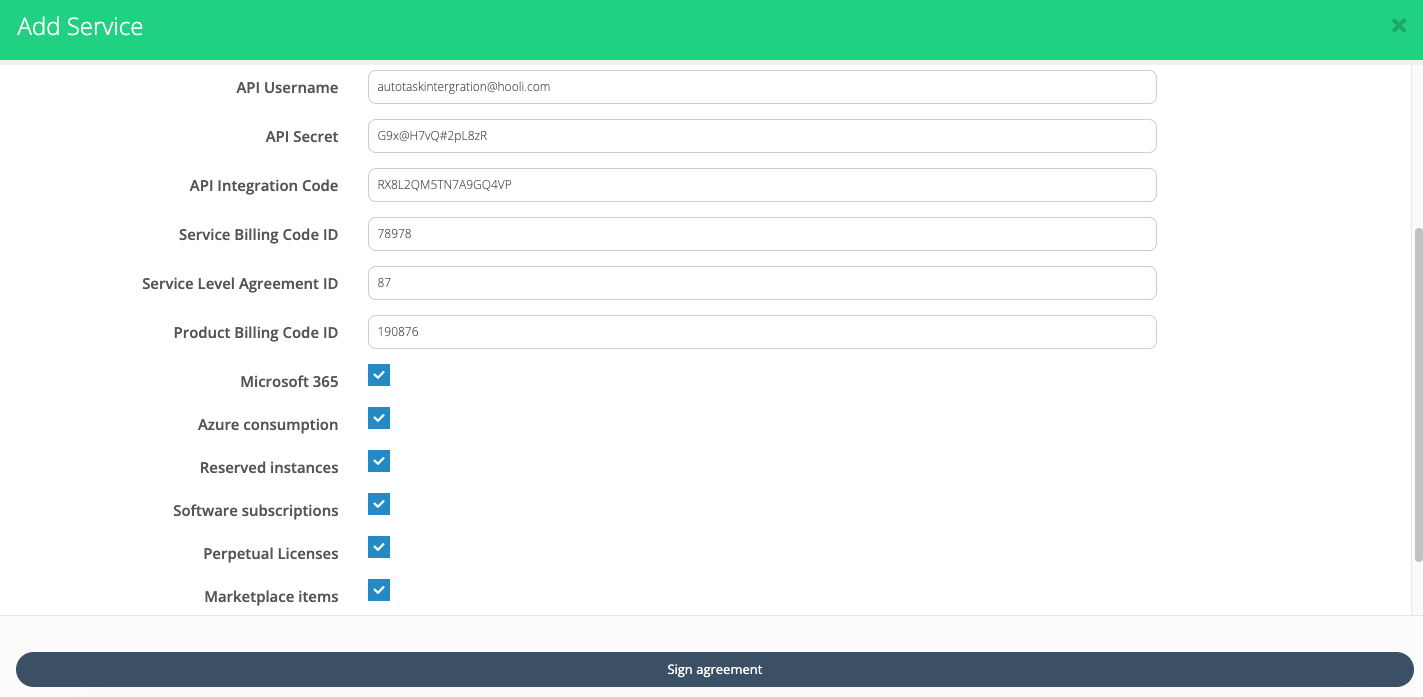
Enter API Username and API Secret from an Autotask API user account (create one in Autotask if needed, selecting “Cloudmore – CSP Automation" as the Integration Vendor).
Enter the API Integration Code obtained from Cloudmore.
For Service Billing Code ID: Use the ID retrieved from the Autotask REST API Explorer.
For Product Billing Code ID: Use the ID retrieved from the Autotask REST API Explorer.
For Service Level Agreement ID: Use the ID retrieved from the Autotask REST API Explorer.
Select checkboxes for Microsoft services to include in the billing sync: Microsoft 365, Azure consumption, Reserved instances, Software subscriptions, Perpetual Licenses, Marketplace items.
Select Export Subscription PO Number if you would like the PO number associated with the subscription to be exported.
Click Sign agreement.
View the Billing Information in Autotask
The integration performs a check every 24 hours to identify any new billing reports generated in the previous four days, exporting them to Autotask if found. For example, if a check runs on October 10th, it would detect and export a billing report generated on October 6th (four days prior).
Initial syncs create new contracts in Autotask, while subsequent ones update existing ones (e.g., for Microsoft CSP or Azure services) unless new subscriptions are added.
Log in to the Autotask partner account.
Go to Contracts > Contracts > Search
Open a contract by name.
Click Charges to view consolidated charges and costs.
Notes
Do not delete Cloudmore created contracts in Autotask without confirming with Cloudmore Support, as data must stay in sync.
Cloudmore shows pro-rata charges and changes as multiple lines, but exports combine them into one line per contract in Autotask (largest quantity for license based subscriptions).
Next steps
Verify billing sync by checking new or updated contracts in Autotask, 4 days after the billing report becomes available.
Contact support@cloudmore.com for assistance with discrepancies or if you would like a export triggered without using the automatic sync.