Microsoft GDAP Relationships
Overview
This document covers the creation and management of GDAP relationships on the Cloudmore platform.
View Current Relationships
Log in to Cloudmore.
Navigate to My Services > Microsoft 365 CSP Direct
Select Admin Relationships.
-20260331-084312.png?inst-v=6ab7aa96-9bdb-4468-af90-8900e361a923)
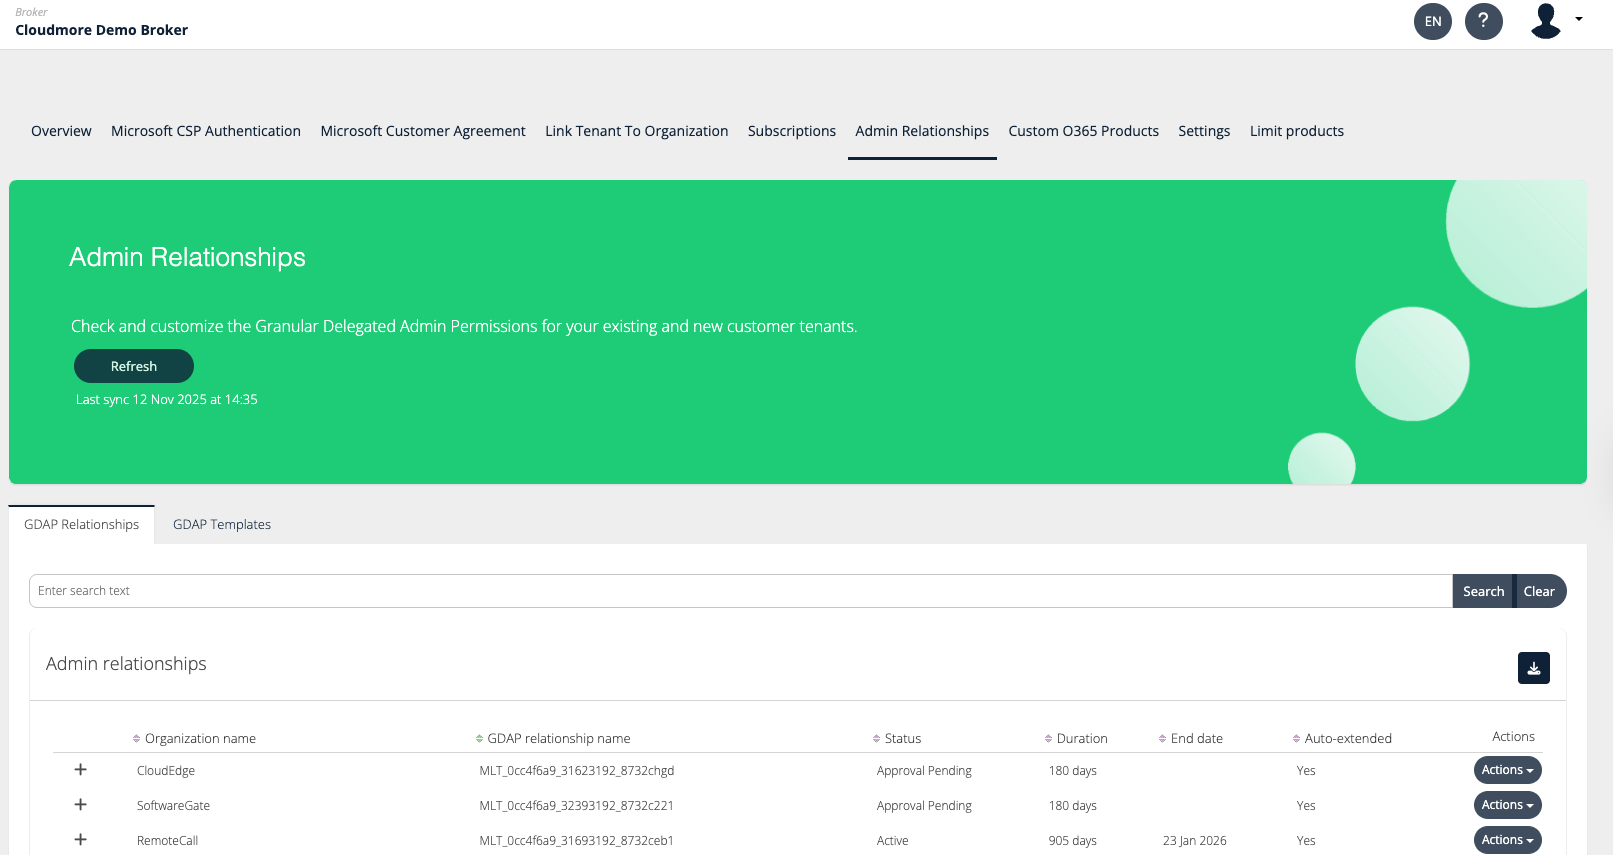
You will be able to view existing relations and add new ones. Under the actions, you will be able to modify existing relationships as well as terminate them.
Add New Relationship
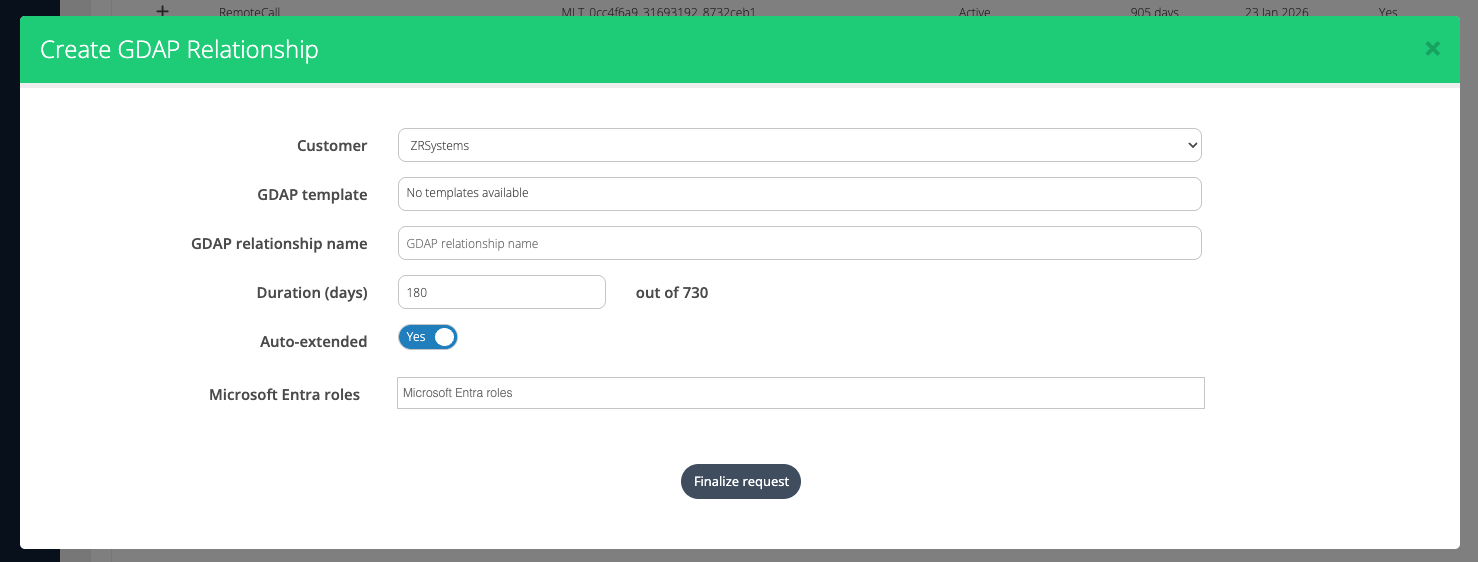
To add a new relationship, click on Add new admin relationship.
Important fields
Fill in the details to create a new relationship
Customer: The name of the organization to be selected from the list.
GDAP Template: The GDAP template. Refer to the GDAP template for more information.
GDAP relationship name: The unique identifier or label for the relationship name.
Duration: Let you specify the duration you want the relationship to be valid.
Auto-extend: decides whether the relationship is automatically extended on expiration. Keep in mind that any relationship with the Global admin role included can not be auto-extended.
Microsoft Entra roles: Let you define what roles to include in requests based on the template.
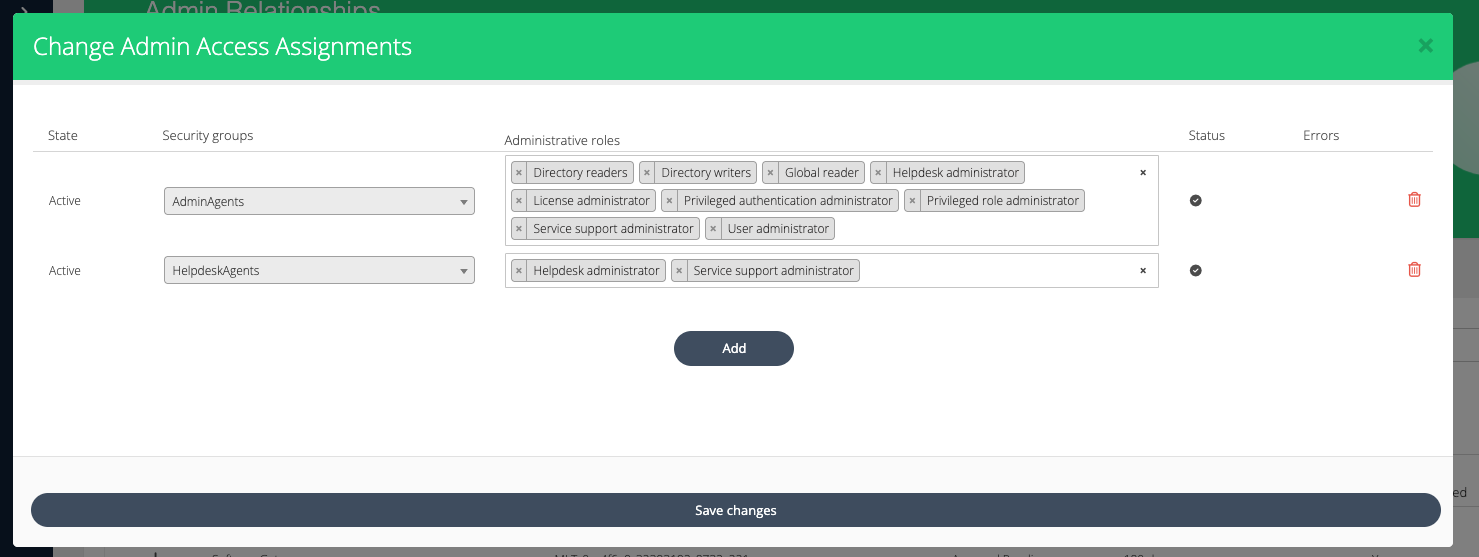
Update Admin Access
To change the admin access, click on Actions > Change admin access assignments.
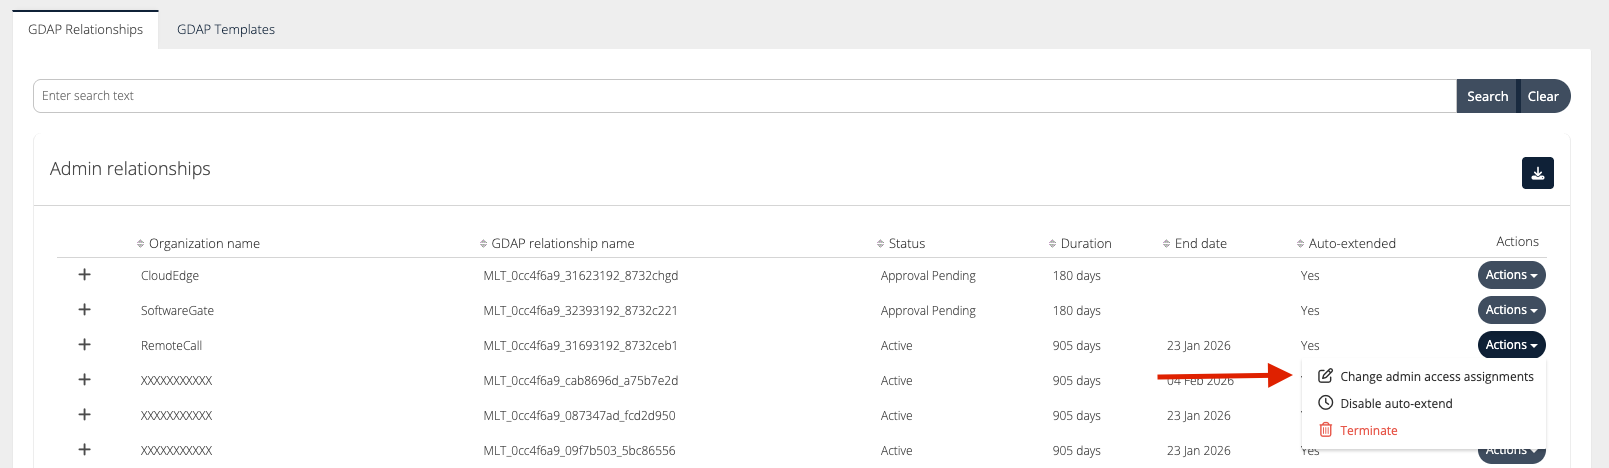
Make the necessary changes and click on Save Changes.
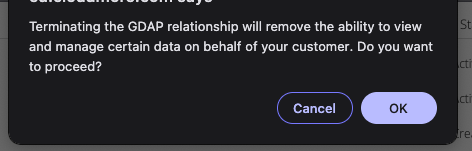
Terminate Relationship
To terminate a relationship, click on Actions > Terminate.
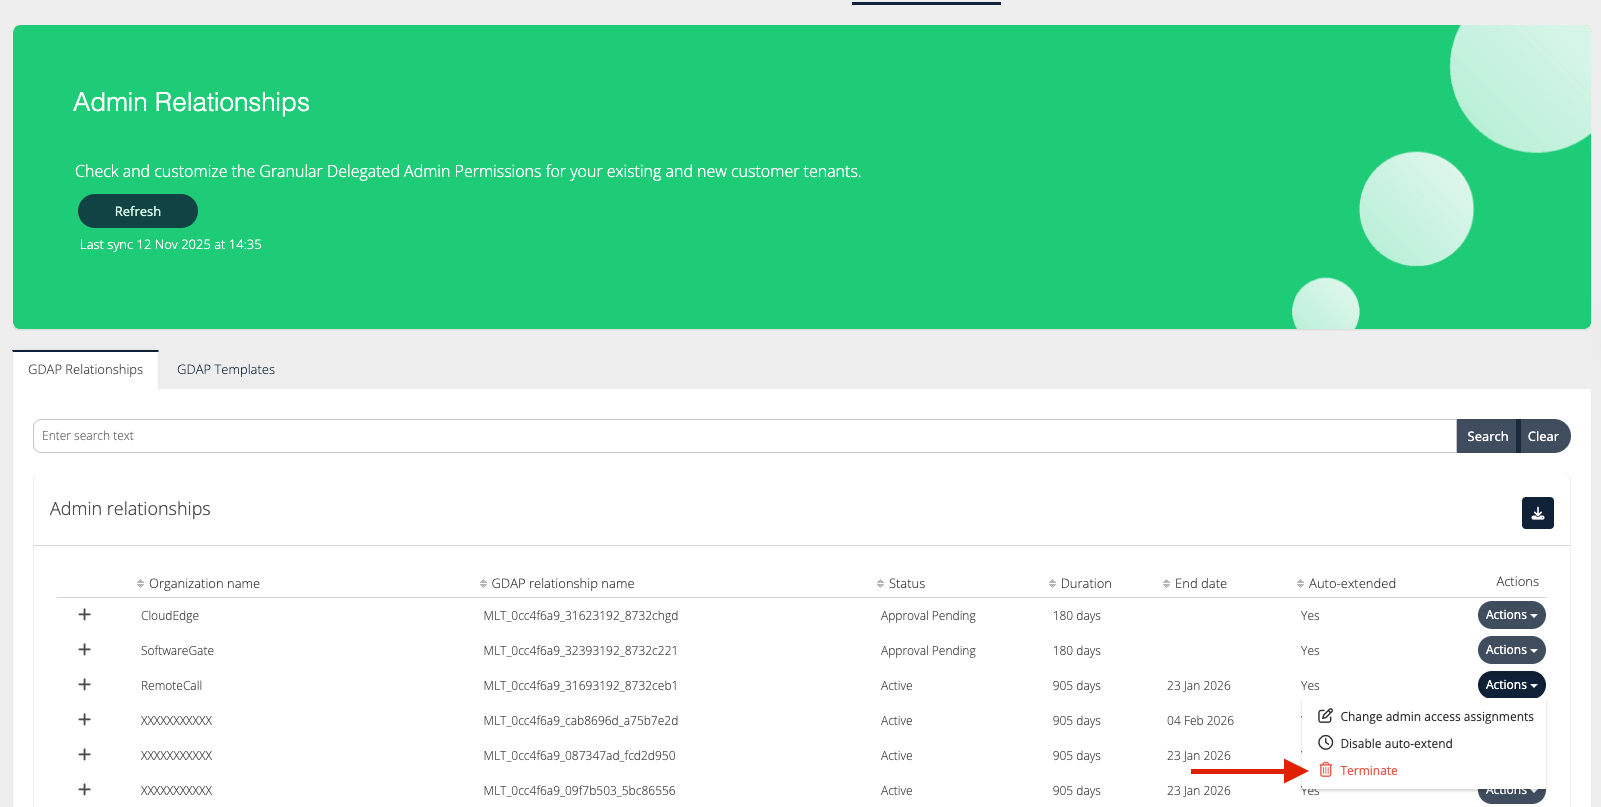
Confirm the action by clicking on OK.