Overview
CSP tenants and subscriptions can be created and updated directly in Cloudmore, without needing to access the Microsoft Partner Centre.
This guide covers all the ways you can manage Microsoft 365 subscriptions in Cloudmore.
These tools help you manage your subscriptions efficiently, whether you're upgrading, editing, suspending, or cancelling.
Pre-Requisites
-
Brokers: The Microsoft 365 CSP Direct service should be added from the Marketplace
-
Organizations: The Microsoft 365 CSP Direct service should be added from the E-Store
Important terminology related to Subscriptions
-
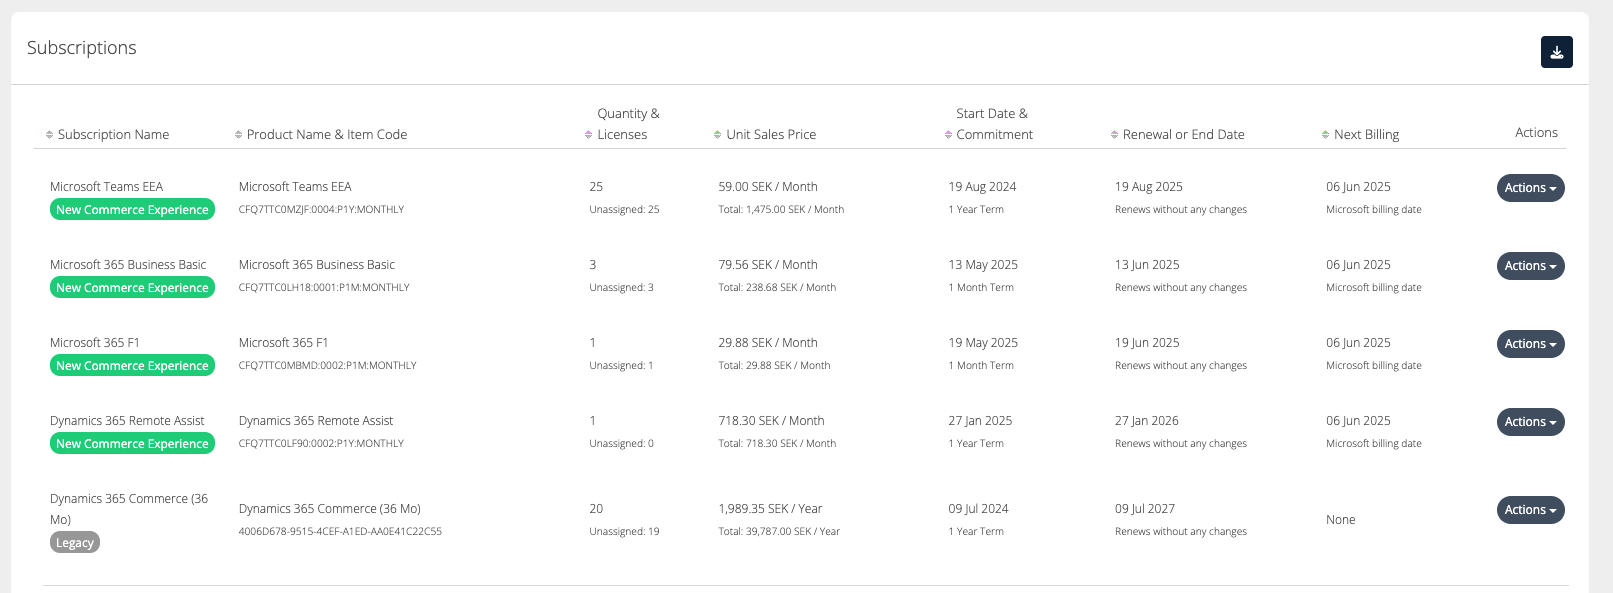
Subscription Name: This is the name assigned when the subscription was created. If a custom or friendly name was entered, it will be displayed here. In addition to that, the type of subscription (Legacy or NCE) is displayed below the name
-
Product Name: This refers to the official Microsoft product title associated with the subscription.
-
Item Code: It is a combination of the product ID, term duration, billing plan, etc.
-
Quantity & Licences: The total number of licenses purchased for the subscription and the number of unassigned licenses.
-
Unit Sales Price: The cost per license and the total subscription price..
-
Start Date & Commitment: The date the subscription begins and the duration of the commitment term.
-
Renewal or End Date: The date the subscription will either renew automatically or end, depending on the renewal setting. It also shows if the subscription renews with or without changes.
-
Renews with changes - shows in case of quantity change, product change. Coterm date will not trigger Renews with changes.
-
Renews without changes - when no changes were made in the Renewal Setting.
-
-
Next Billing: The upcoming date when the next payment will be charged based on the billing cycle.
NCE Subscriptions
-
Subscription Length: The duration of the subscription.
-
Payment Frequency: Determines how often you are billed for the subscription
Legacy Subscription
-
Billing Cycle: Determines how often you are billed for the subscription (Monthly/Annually)
-
Friendly name: A subscription-friendly name that will appear on all subscription views and on billing reports at both the broker and organization levels. (Optional)
-
PO Number: It appears on the O365 billing export and is typically used to help match subscription costs against PO numbers. (Optional)
Subscription Management on Broker level
On the Broker level, you can have a clear overview of the subscriptions by organizations.
You can also export the subscriptions by following these steps:
-
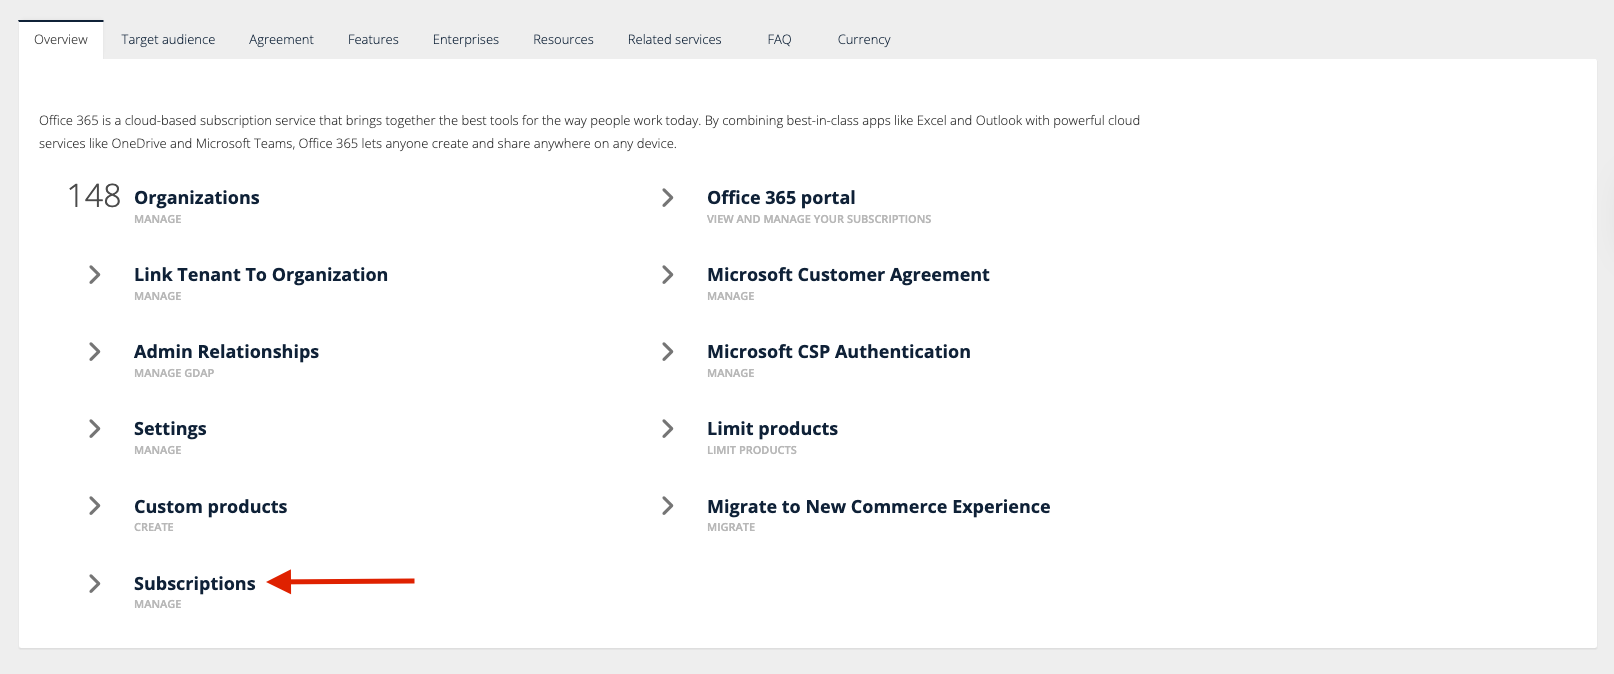
Navigate to My Services > Microsoft 365 CSP Direct
-
Click on Subscriptions.
-
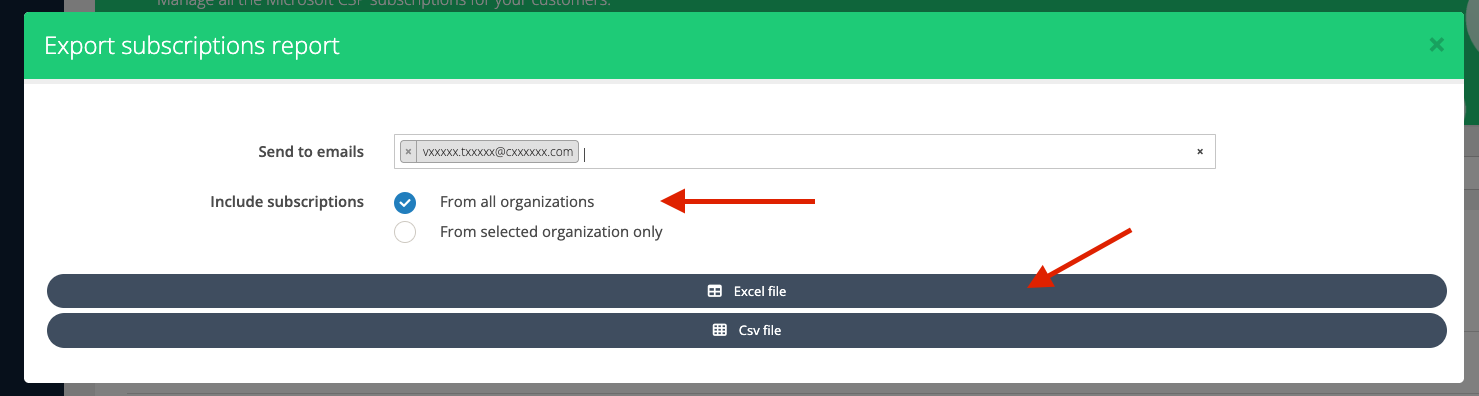
Click on the download icon.

-
Once the download modal appears, select all organizations and the file type required. The report will be sent to the email(s) added to the email list.
Subscriptions Export on Organization Level
|
Roles → Columns ↓ |
Broker Admin roles |
Key Account Manager roles |
Sales Agent role |
|---|---|---|---|
|
Organizations included →
|
All organizations |
Organizations from the assigned Organization Groups |
Organizations from the assigned Organization Groups |
|
Organization |
|
|
|
|
Subscription ID |
|
|
|
|
Friendly name |
|
|
|
|
Product name |
|
|
|
|
Start Date |
|
|
|
|
End date |
|
|
|
|
Item code |
|
|
|
|
Consumed units |
|
|
|
|
Quantity |
|
|
|
|
Subscription Period |
|
|
|
|
Payment Frequency |
|
|
|
|
Status |
|
|
|
|
PONumber |
|
|
|
|
Unit Sales Price |
|
|
|
|
Price Level |
|
|
|
|
Total Sales Price |
|
|
|
|
Difference from Recommended Price |
|
|
|
Subscription Management on the Organization Level
-
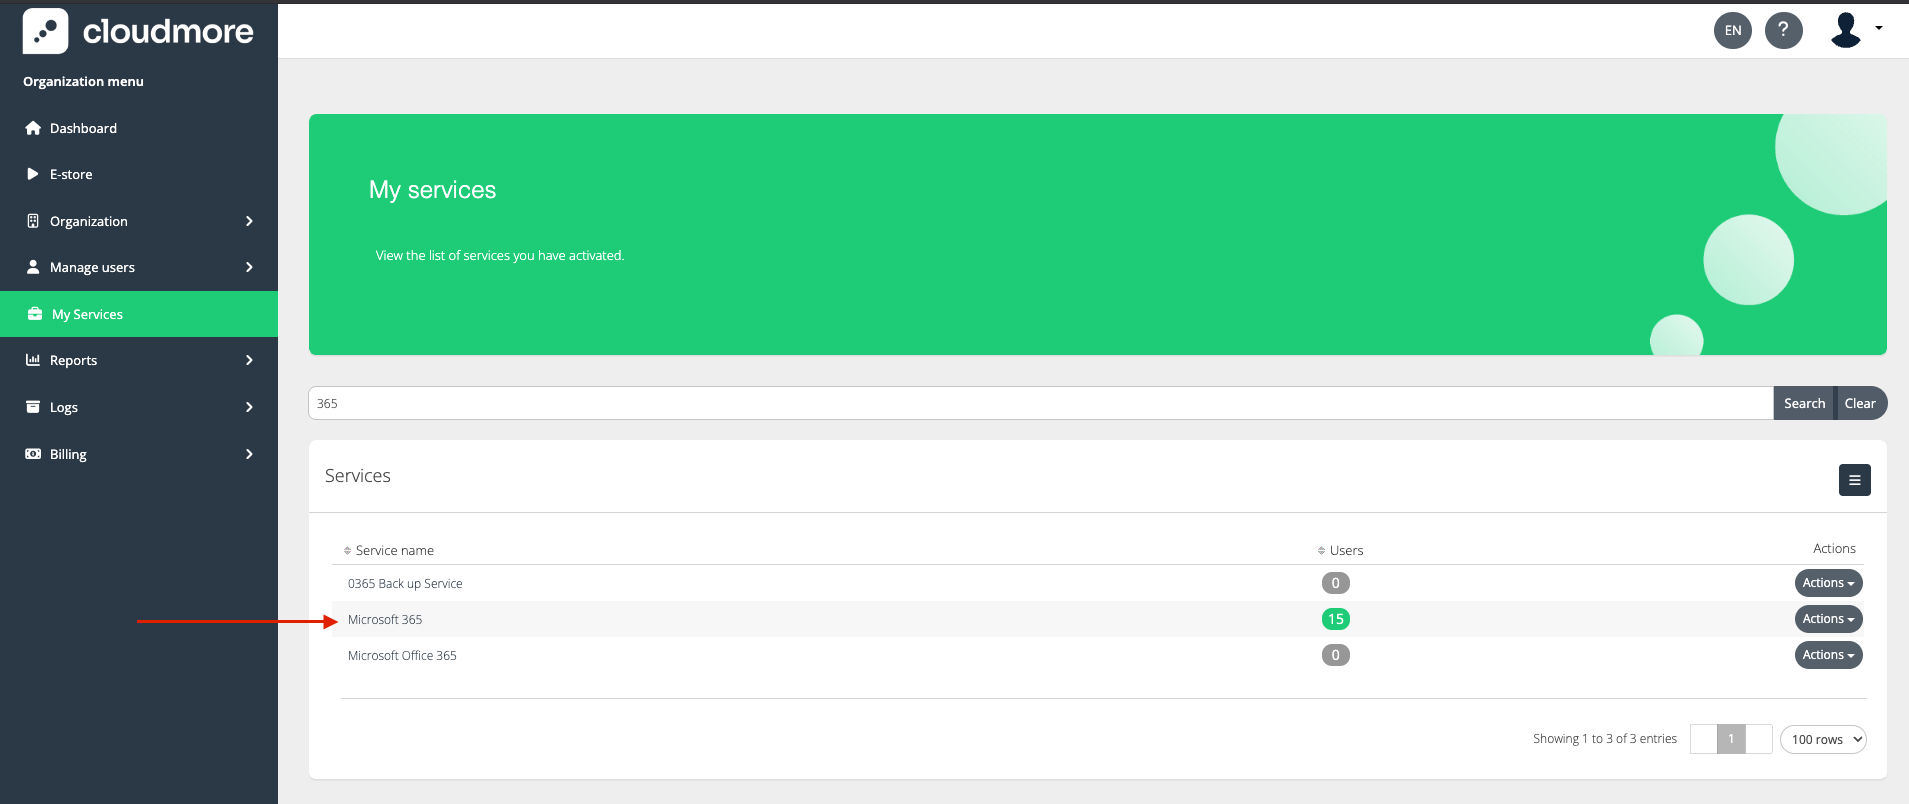
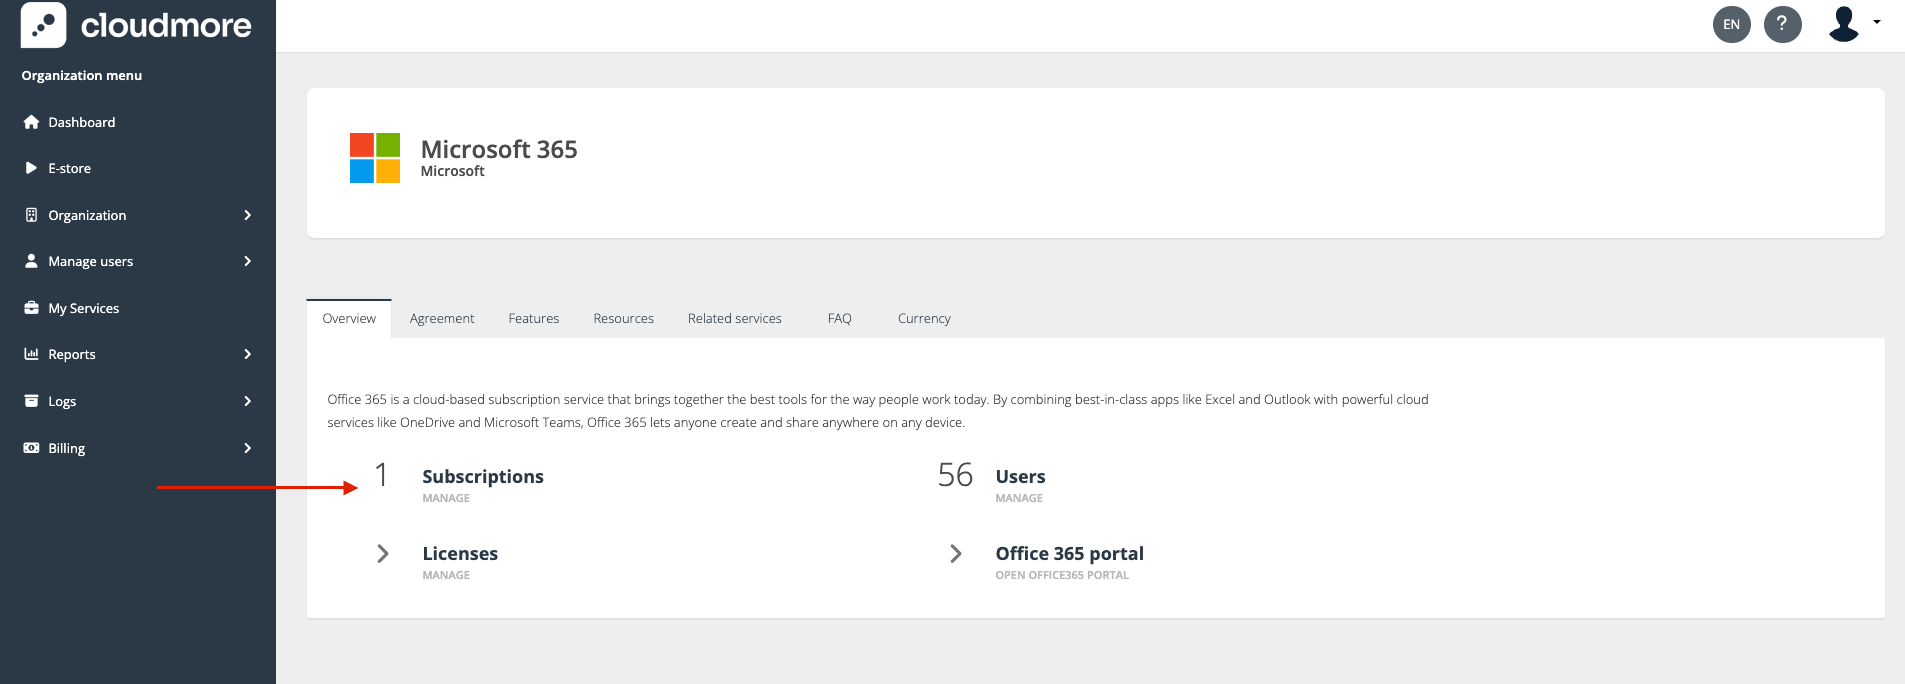
Go to My Services > Microsoft 365 CSP Direct > Subscriptions.
-
Find the subscription you want to manage.
-
Click the Actions dropdown on the right side of the subscription row.
Subscriptions Export on Organization Level
The table below specifies which fields are included in the Excel export, depending on the role.
|
Roles →
|
Broker Admin roles |
Key Account Manager roles |
Sales Agent |
Organization Admin |
|---|---|---|---|---|
|
Organization |
|
|
|
|
|
Subscription ID |
|
|
|
|
|
Friendly name |
|
|
|
|
|
Product Name |
|
|
|
|
|
Start Date |
|
|
|
|
|
End Date |
|
|
|
|
|
Item Code |
|
|
|
|
|
Consumed Units |
|
|
|
|
|
Quantity |
|
|
|
|
|
Sales Price |
|
|
|
|
|
Subscription Period |
|
|
|
|
|
Payment Frequency |
|
|
|
|
|
Status |
|
|
|
|
|
PONumber |
|
|
|
|
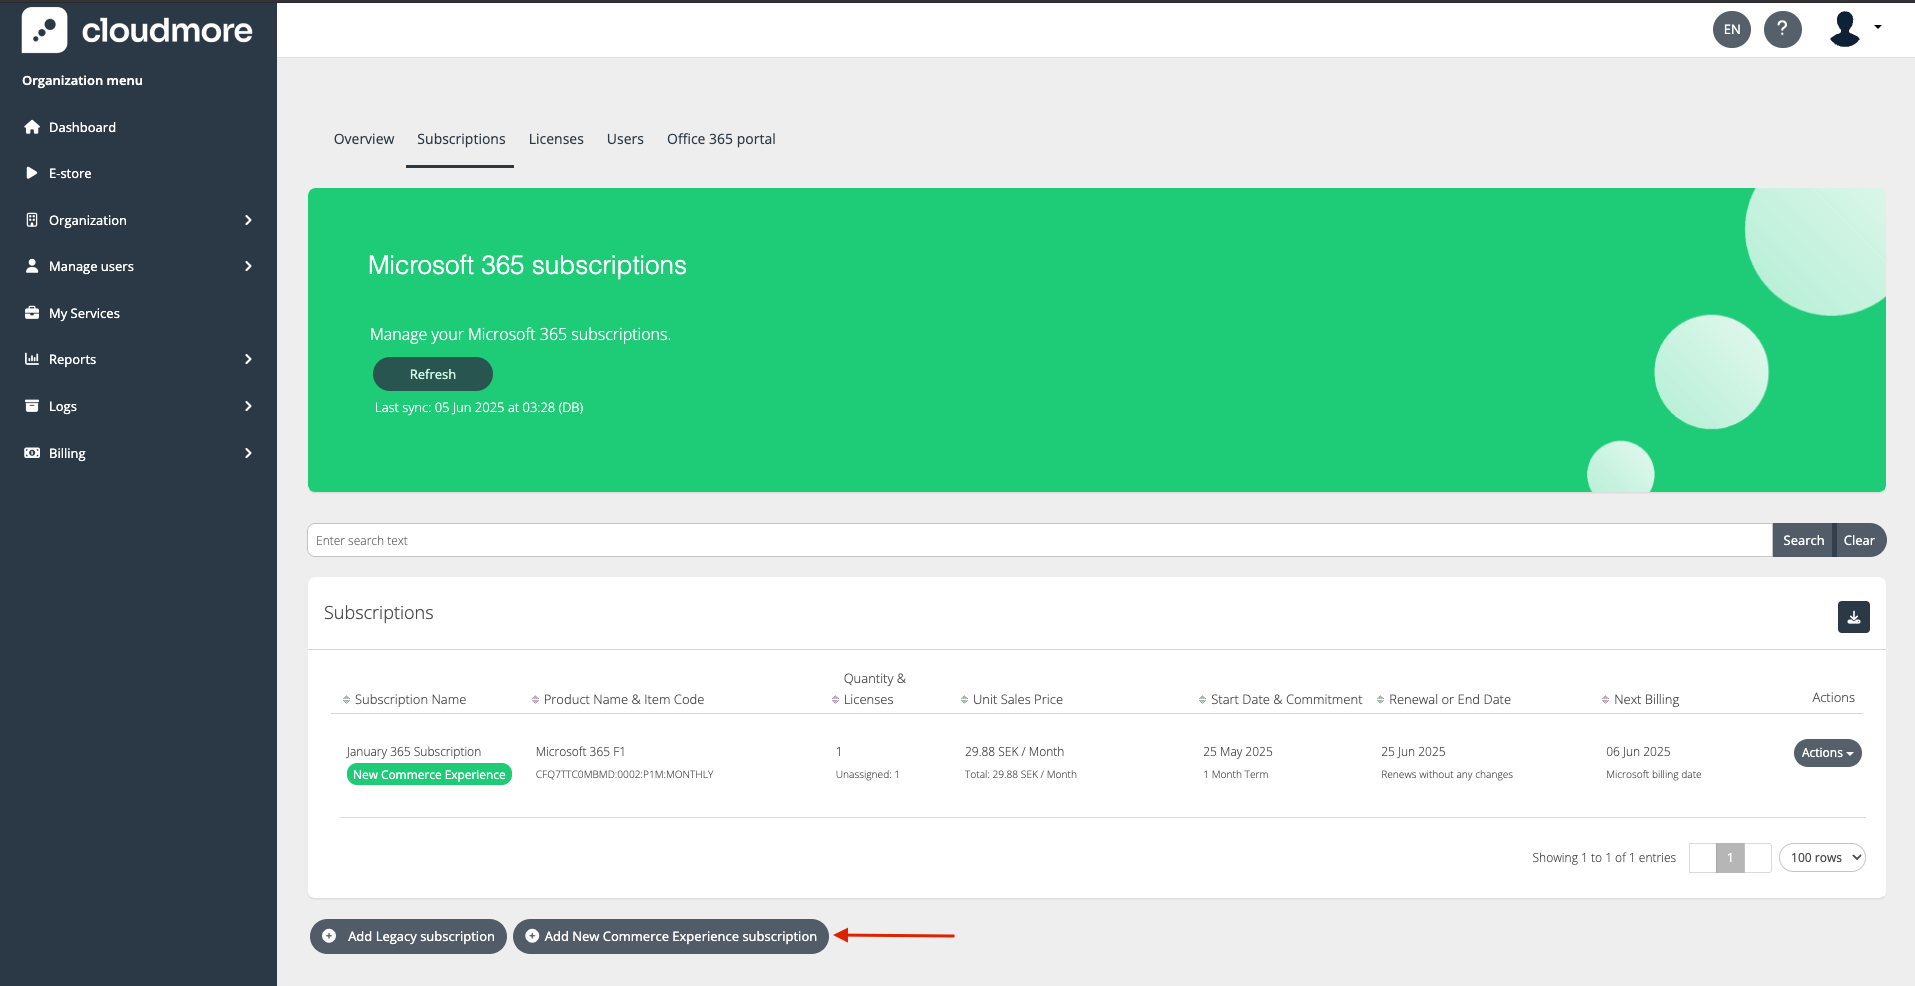
Creating a Subscription
-
Click Add New Commerce Experience Subscription
-
Fill in the details for the subscription by selecting the product and duration, and click on Create Subscription.
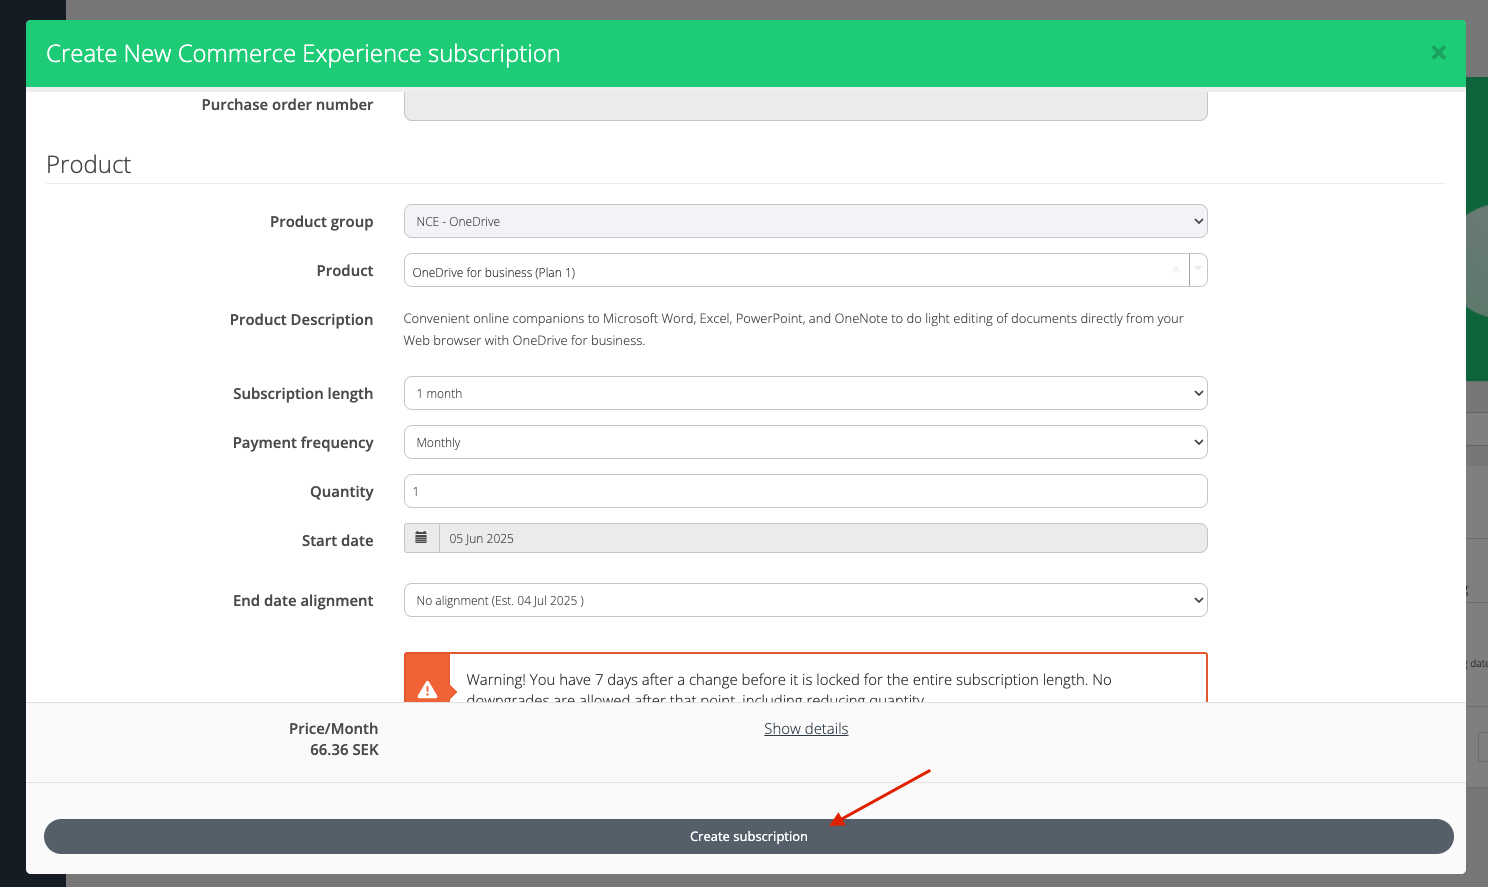
Create a NCE Subscription
When “Create subscription” confirmation button is clicked, the window will close and the subscription will be processed and reliably created in the background.
For the duration of the background creation process, the subscription will show status “Processing”.
If there was an error with creating the subscription, you can go Actions → Edit and hit “Create subscription” again to re-trigger the subscription creation process.
Once successfully created, there will be no additional label next to the subscription.
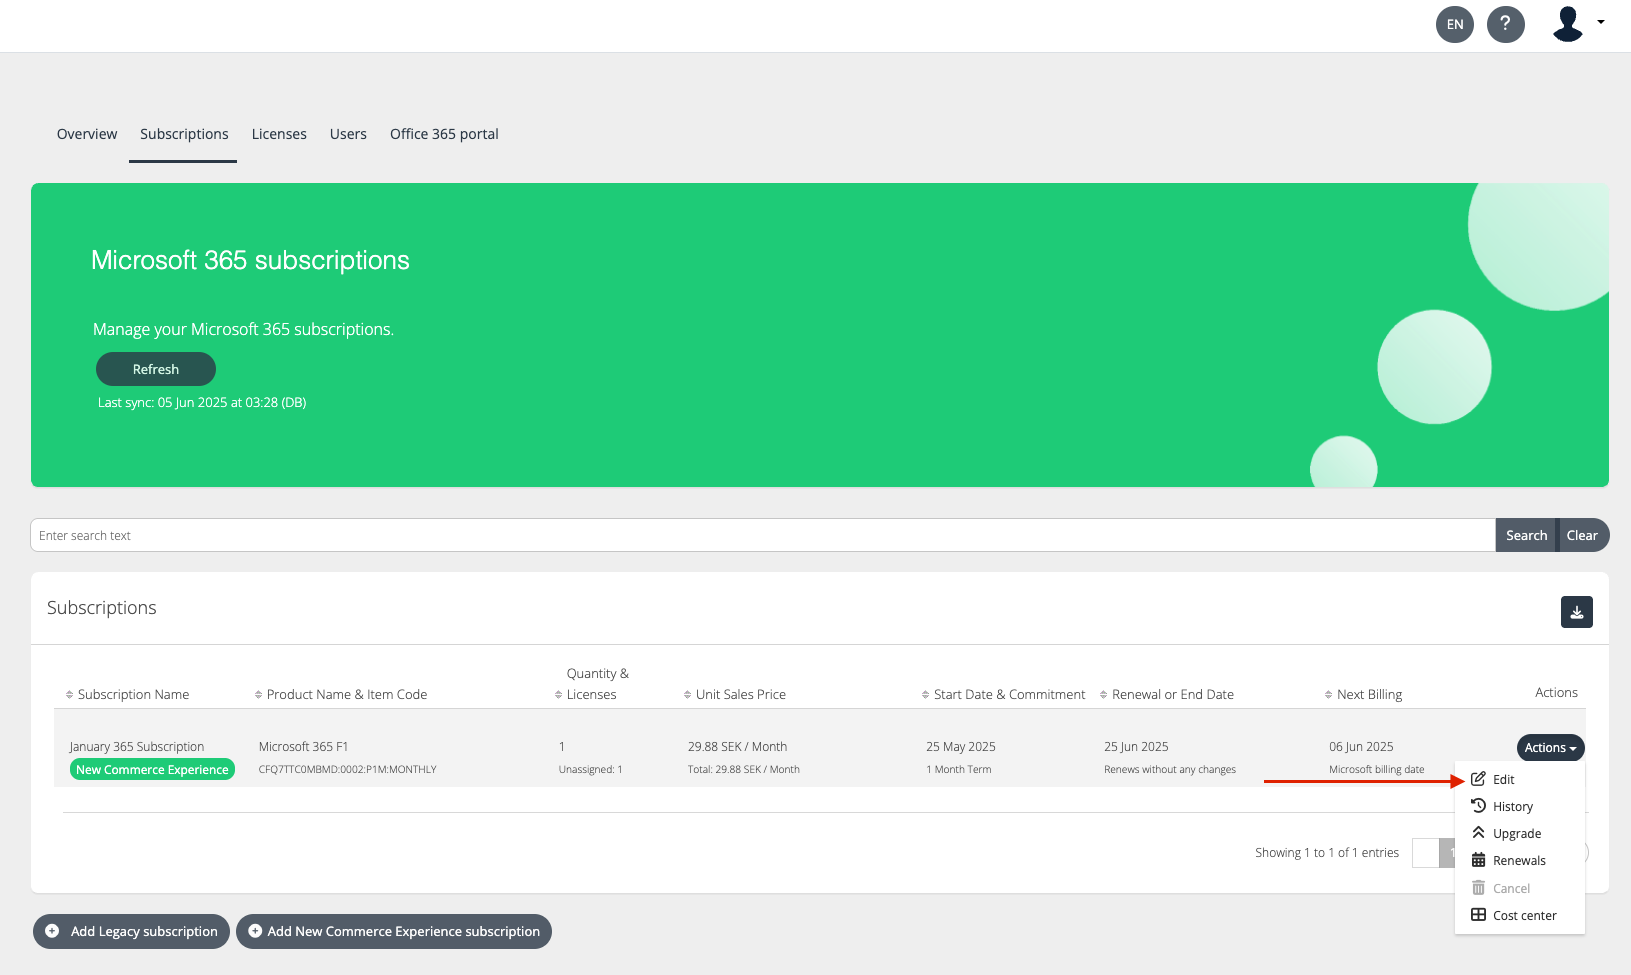
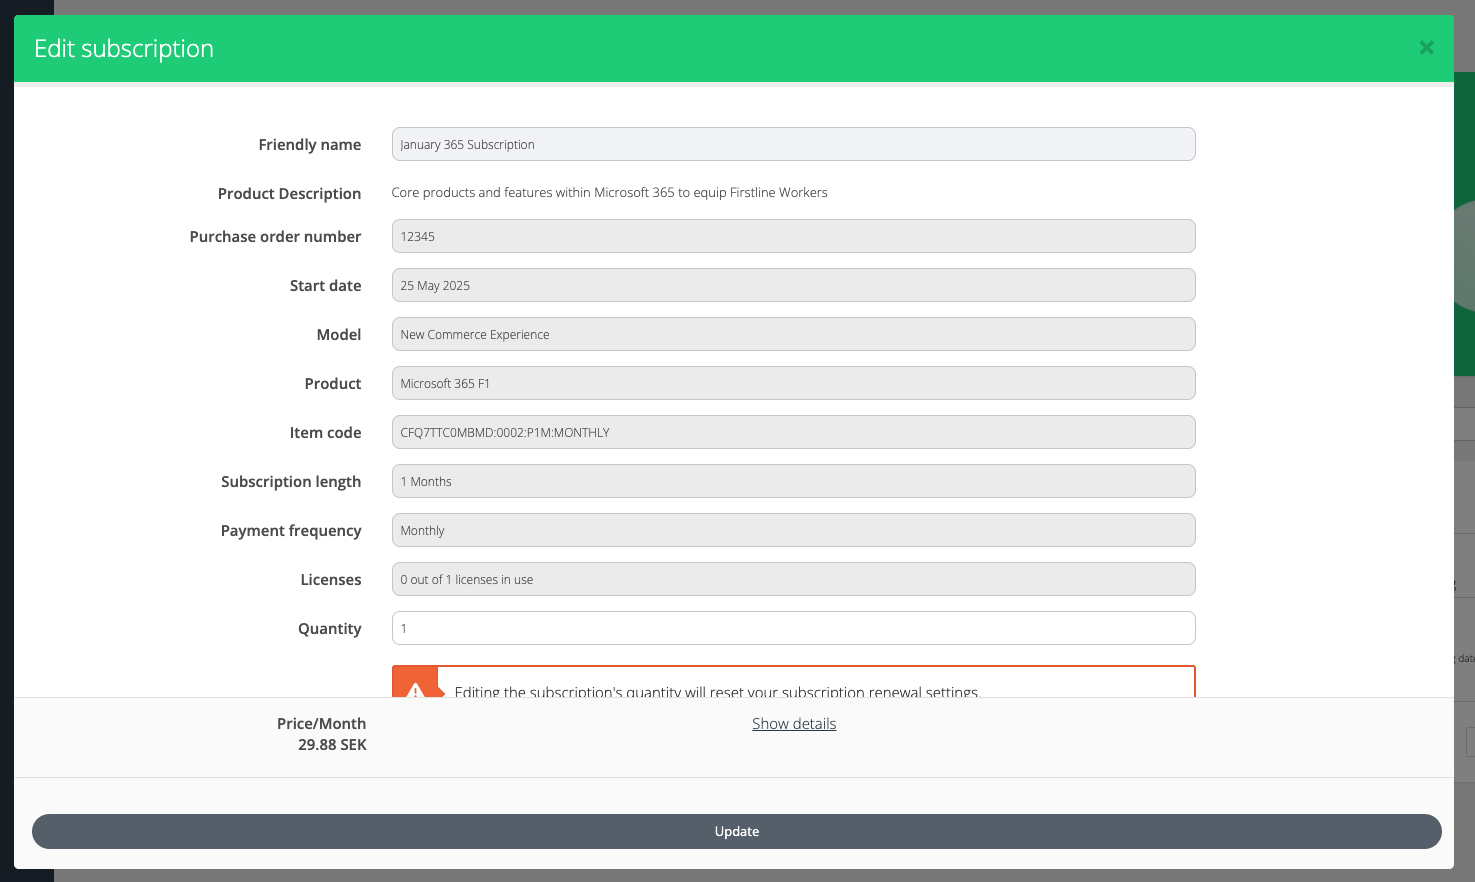
Editing a Subscription
-
To edit a subscription, click on Actions > Edit.
-
Update the required changes and click Update.
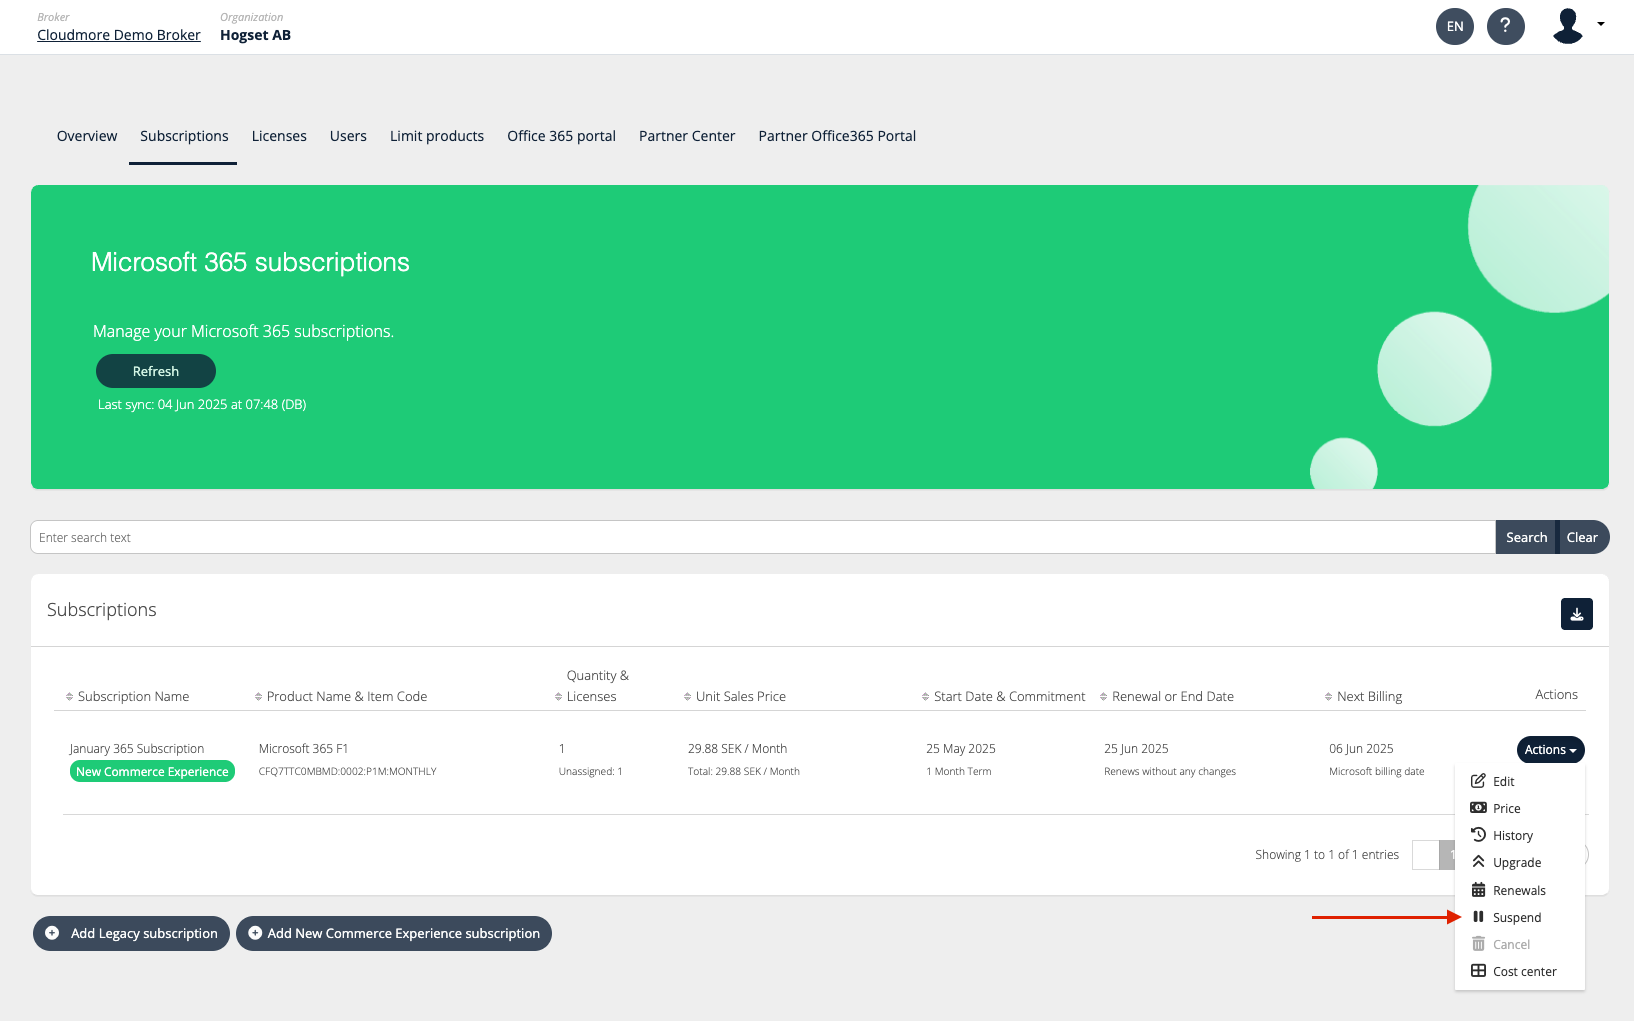
Suspending a Subscription
Legacy suspend is an operation to cut the access to a Legacy seat-based subscription and as a bonus Partner won't be charged for the time the subscription is suspended. After 90 days, the subscription, being in a suspended state it will be moved to the cancelled state. From a self-serve point of view (I have some doubts here, since there is no cancellation as in NCE), this is Partner-level operation and meant for the Partner to control access to subscriptions (in case of missed payments, for example).
NCE suspend is an operation to cut access to a NCE seat-based subscription, but the Partner will still be charged for the subscription. The subscription won't be moved to the cancelled state after 90 days of being suspended, instead, it will be moved to the disabled state after the subscription's term ends. From a self-serve point of view, this is a Partner-level operation and meant for the Partner to control access to subscriptions (in case of missed payments, for example).
Suspending a subscription can be done only by the broker.
-
Click on Actions > Suspend.
-
Click on the confirmation alert, and the subscription then moves to the Suspended state.
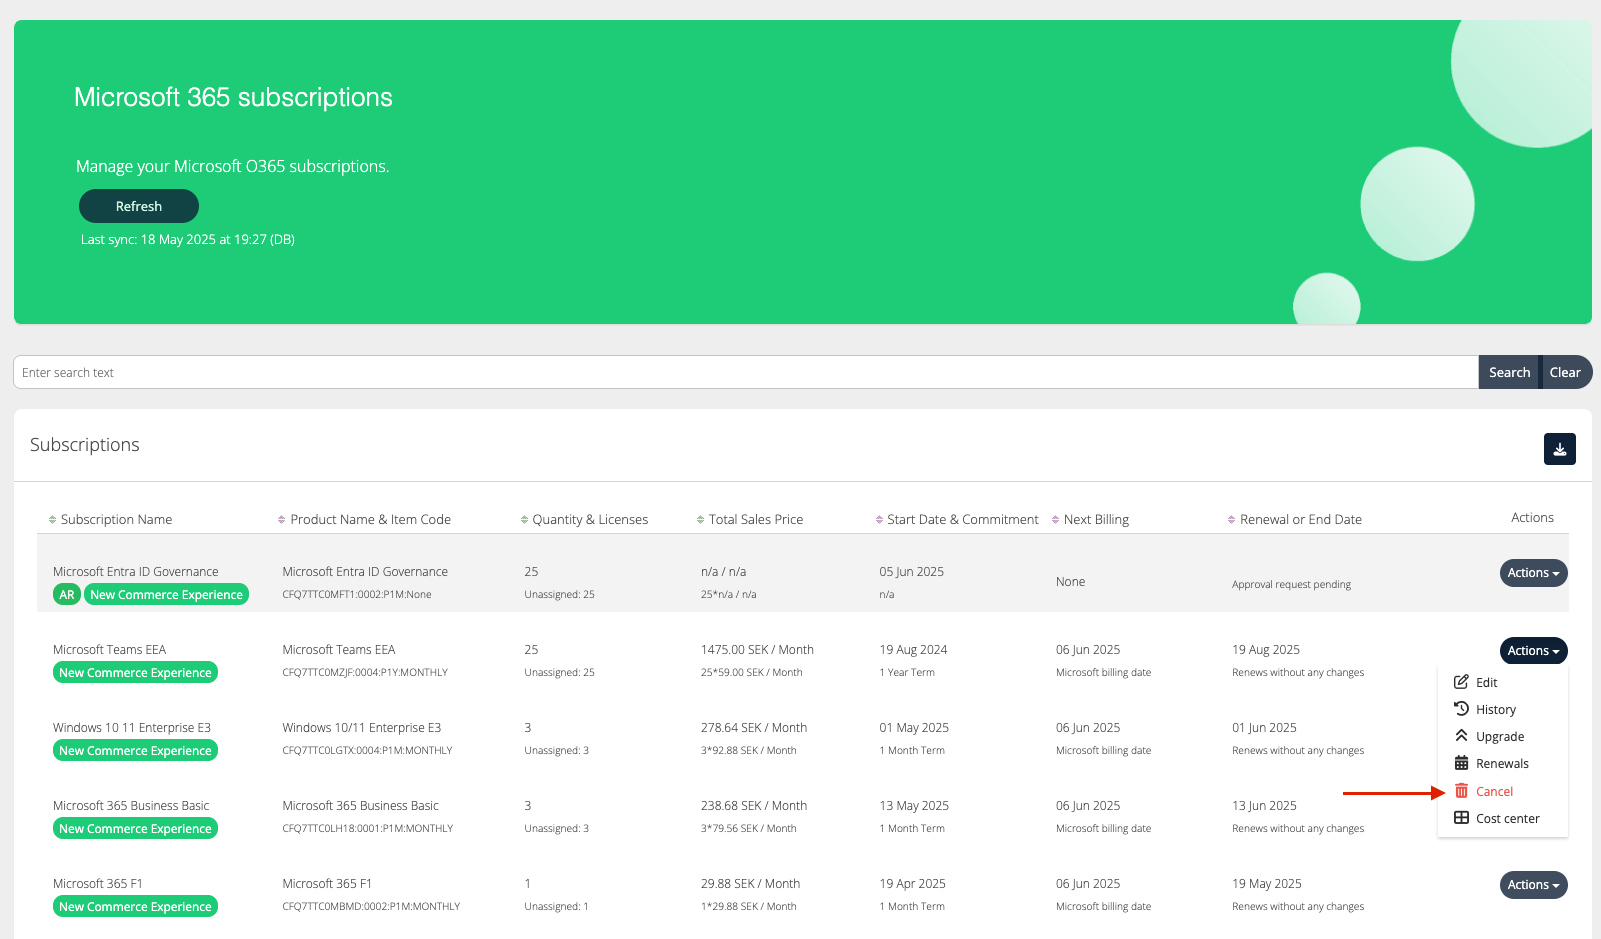
Cancelling a Subscription
NCE cancel is a new operation, and it's meant for customers to be able to cancel a subscription that they purchased by mistake or understood that they don't require it. Cancellation can be done only within the Cancellation window (7 days for seat-based and software subscriptions, 30 days for perpetual licenses). In case of cancellation, based on subscription type, Microsoft will reimburse either the full cost of the subscription or only part based on the number of days used. From a self-serve point of view, this is a customer-level operation.
With the introduction of Extended Service Terms, subscriptions on EST will always have the possibility of immediate cancellation. Regular subscriptions cancellation terms remain as described above.
-
Click on Actions > Cancel.
-
Click to confirm the cancellation when the confirmation message appears.
You can only cancel within 7 days of purchase or renewal and 30 days for perpetual licenses.
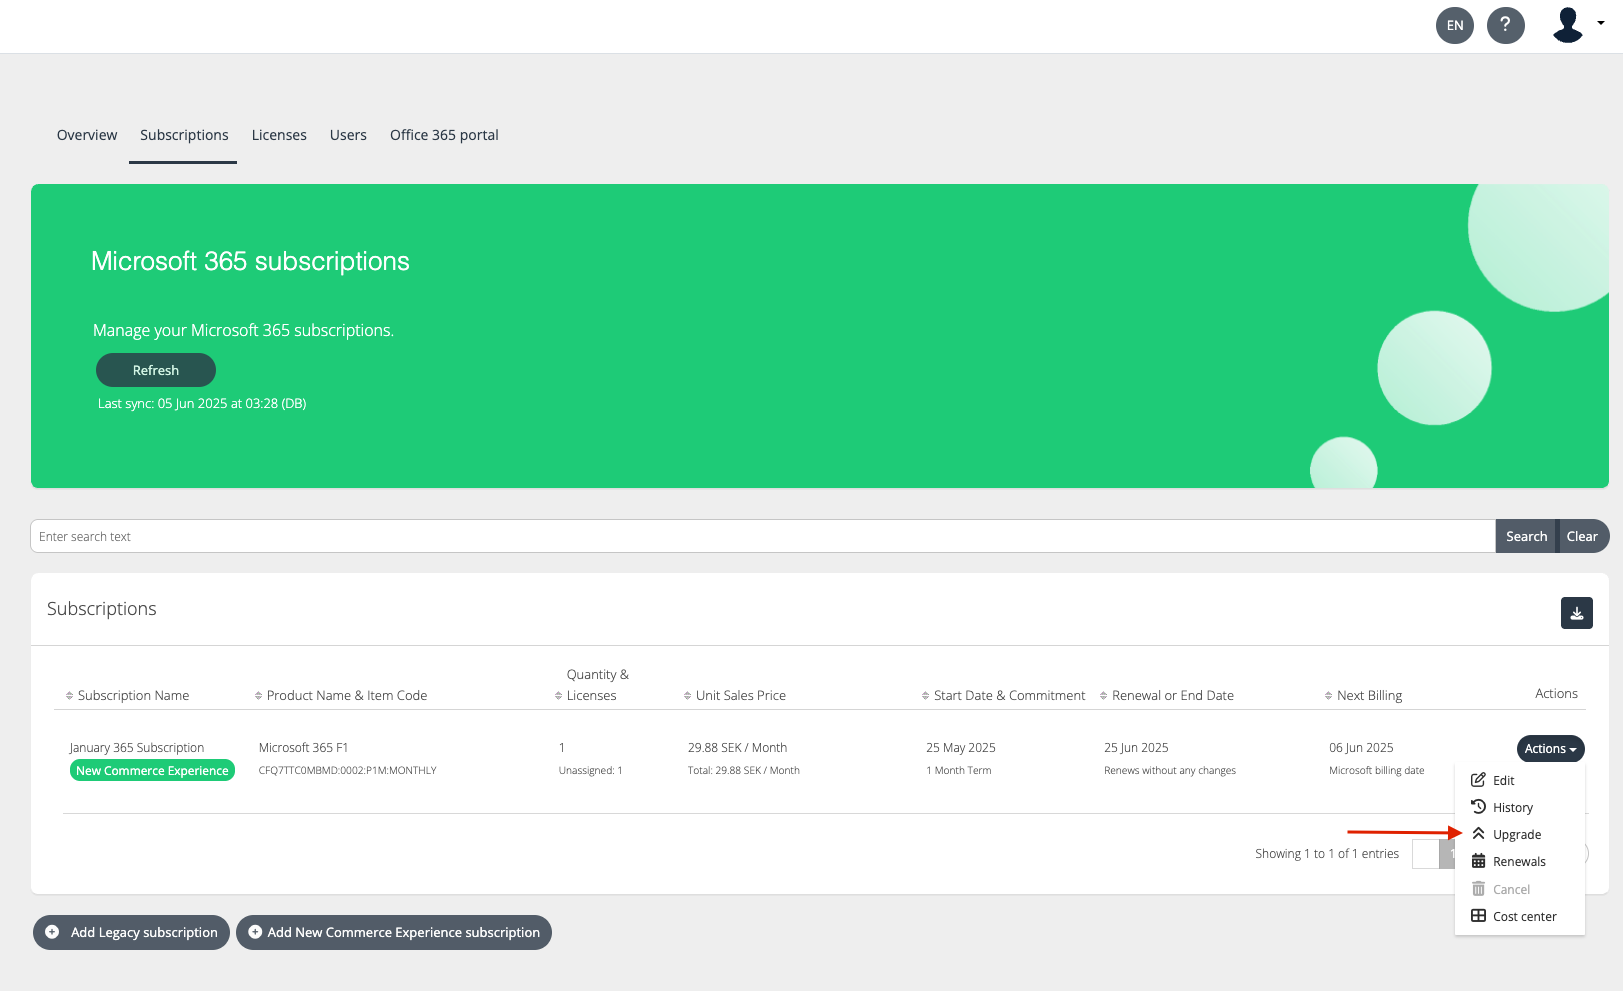
Upgrading a Subscription
Upgrade allows you to move from one Microsoft 365 product to a higher-tier product (e.g., from Microsoft 365 Business Basic to Business Standard). You can upgrade all or part of the licenses in a subscription.
-
Full Upgrade: All licenses are moved to the new product.
-
Partial Upgrade: Only some licenses are moved. You must manually reassign users in the Microsoft 365 Admin Center.
Sometimes it is not possible to upgrade to an existing subscription. It happens when:
-
The destination subscription is in the 7-day cancellation window
-
The current subscription's term duration is shorter than the destination subscription's term duration
-
The destination subscription's end date is later than the end date of the current subscription
-
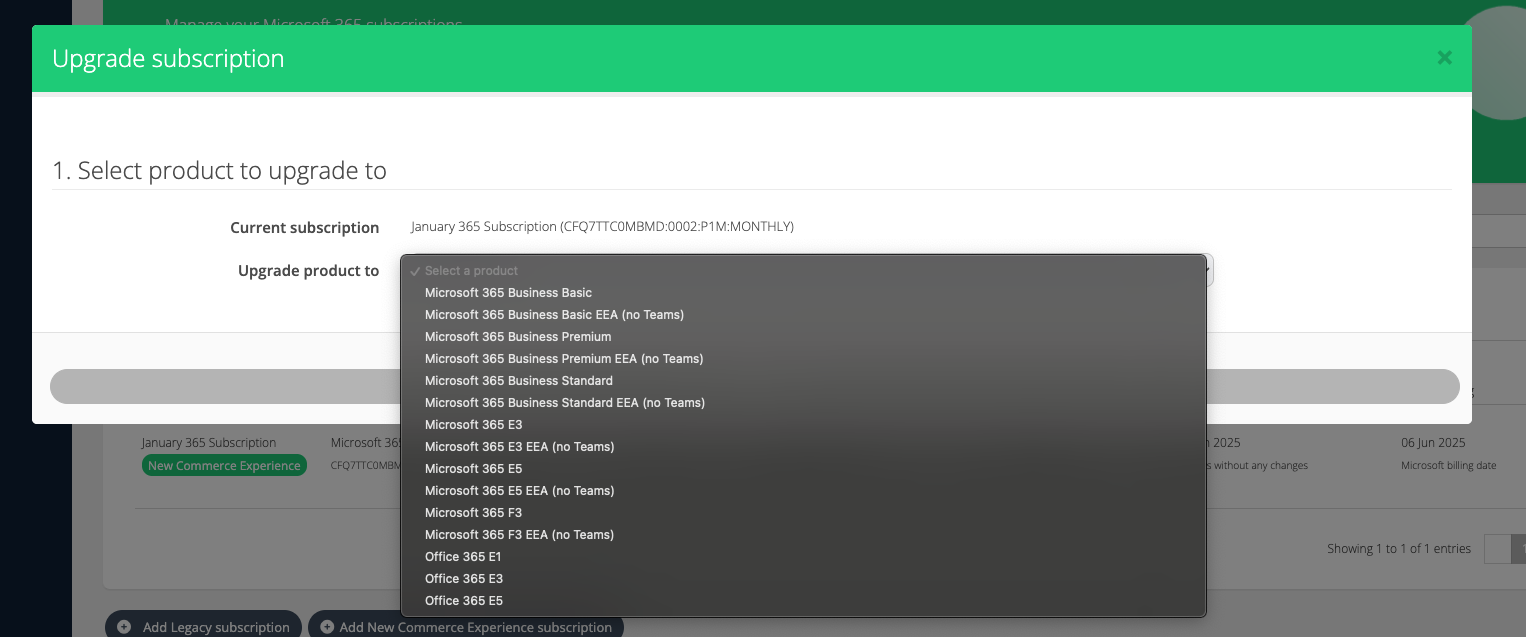
Click on Actions > Upgrade
-
Select the product you wish to upgrade to.
-
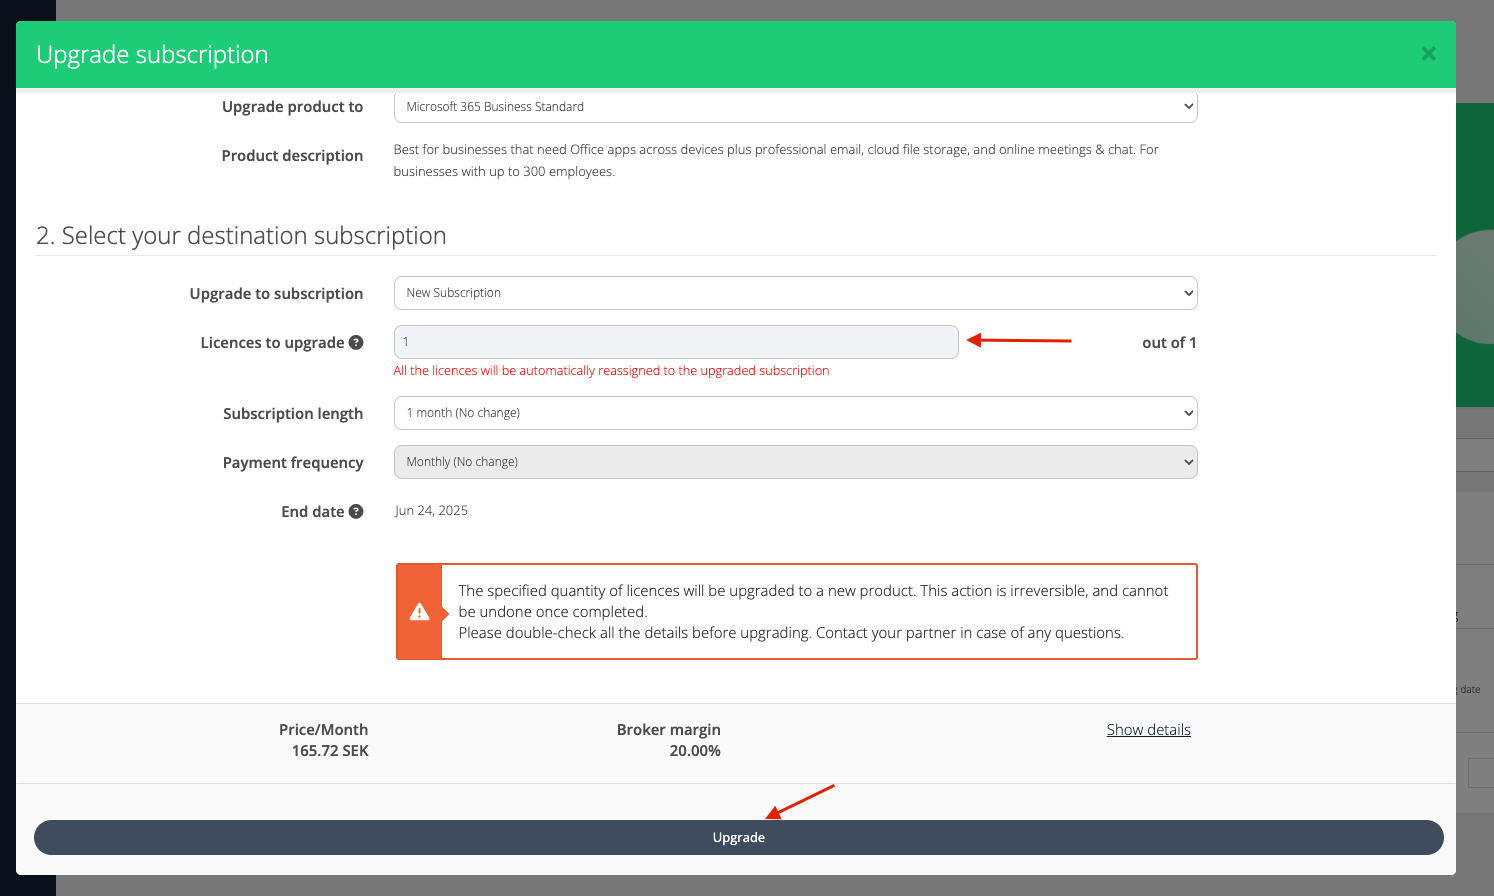
Once the product is selected, select the destination subscription.
-
New subscription - select this option if you’d like to create a separate subscription for the upgraded licences. If you do a full upgrade to a new subscription, your subscription will retain the same subscription ID.
-
Existing subscription(s) - select if you already have a higher-level subscription where you want to transfer the licences

-
-
Once the subscription is selected, enter the upgrade details.
-
Number of licences to upgrade
-
Subscription length
-
Payment frequency.
-
-
Then click Upgrade.
Your changes will be applied within 10 minutes, but sometimes it can take up to an hour on the Microsoft side to process the request.
Note: upgrade action is irreversible! The 7-day cancellation window does not apply to upgrades, so it is not possible to immediately cancel the new subscription or reduce seats of an existing one.
Splitting Licenses to Cost Centers
A cost center is a way to label and track spending by department, team, or project. It helps you understand where money is going and manage budgets better.
-
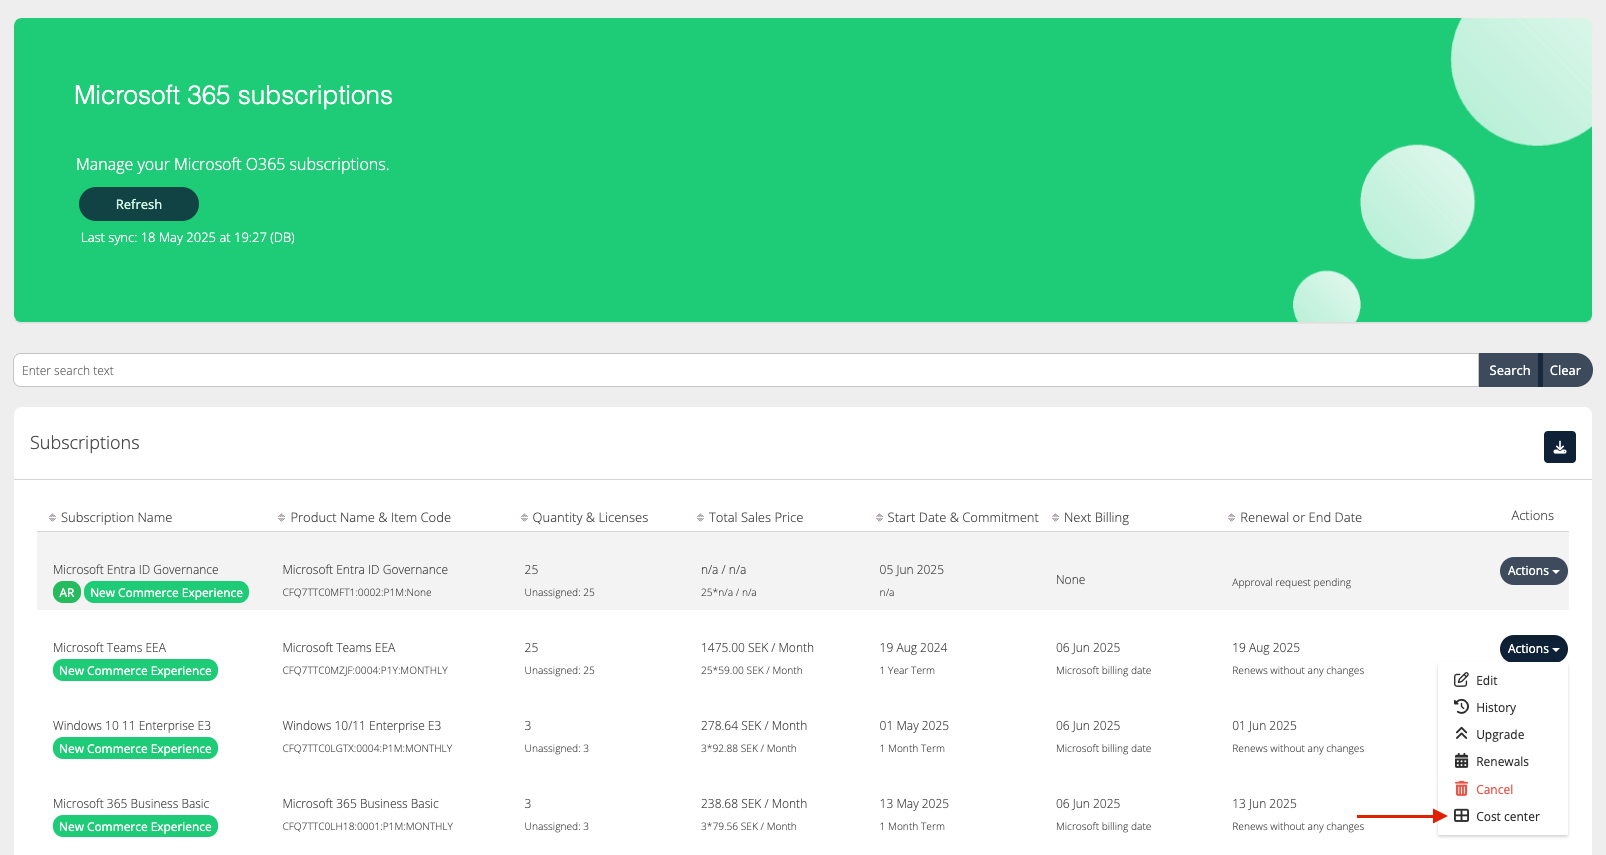
Click on Actions > Cost Center.
-
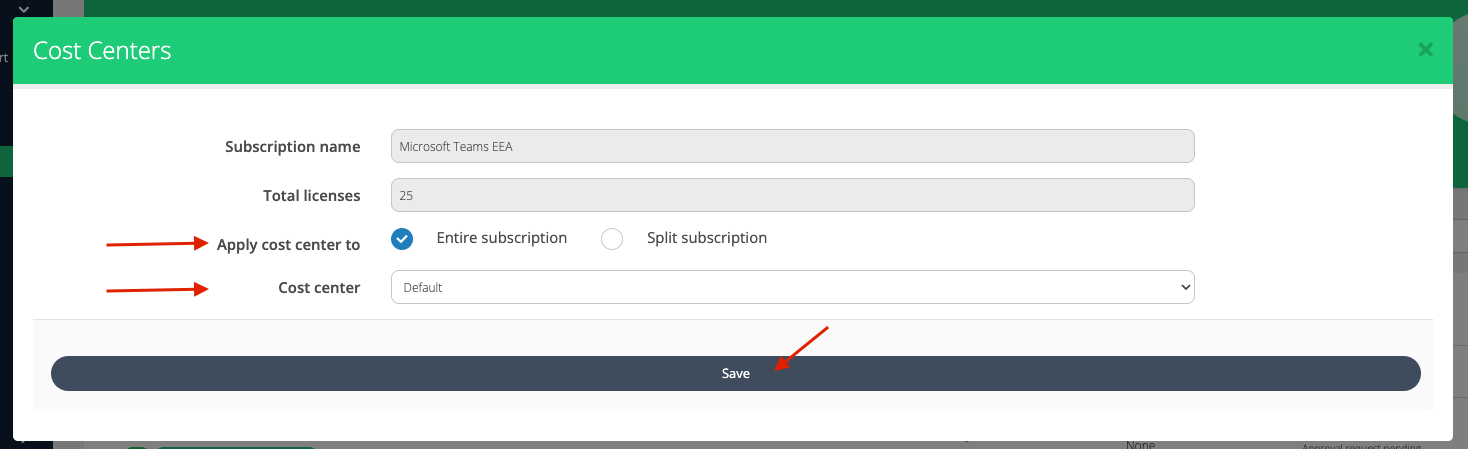
You can select the cost center from the dropdown, and/or apply the cost center to the entire subscription to one cost center, or split the subscription between the cost centers.
Subscription Renewals
You can set up or configure whether the subscription automatically renews at the end of its term or expires. For more information on Renewals, refer to Microsoft CSP Renewal Management
Licenses
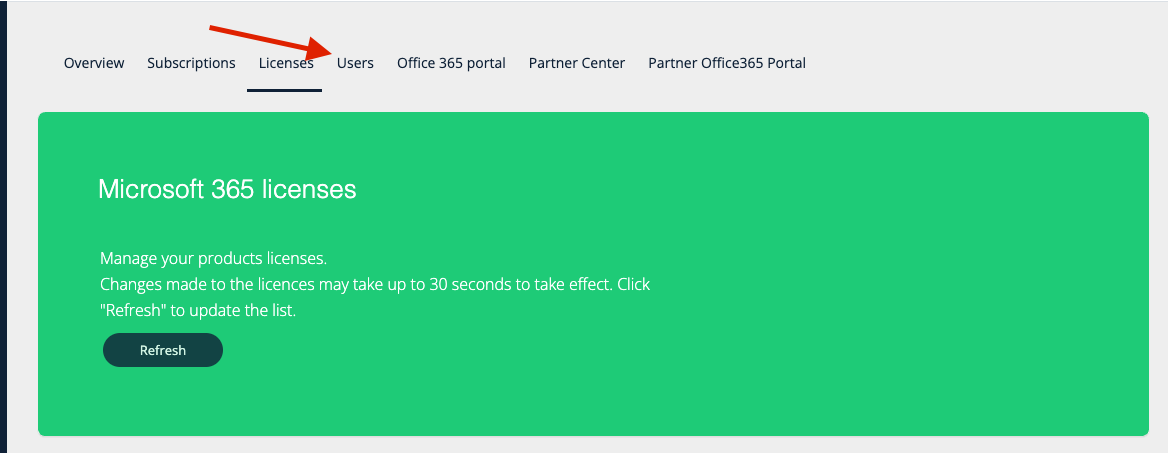
To view the licenses,
-
Navigate to My Services > Microsoft 365 CSP Direct
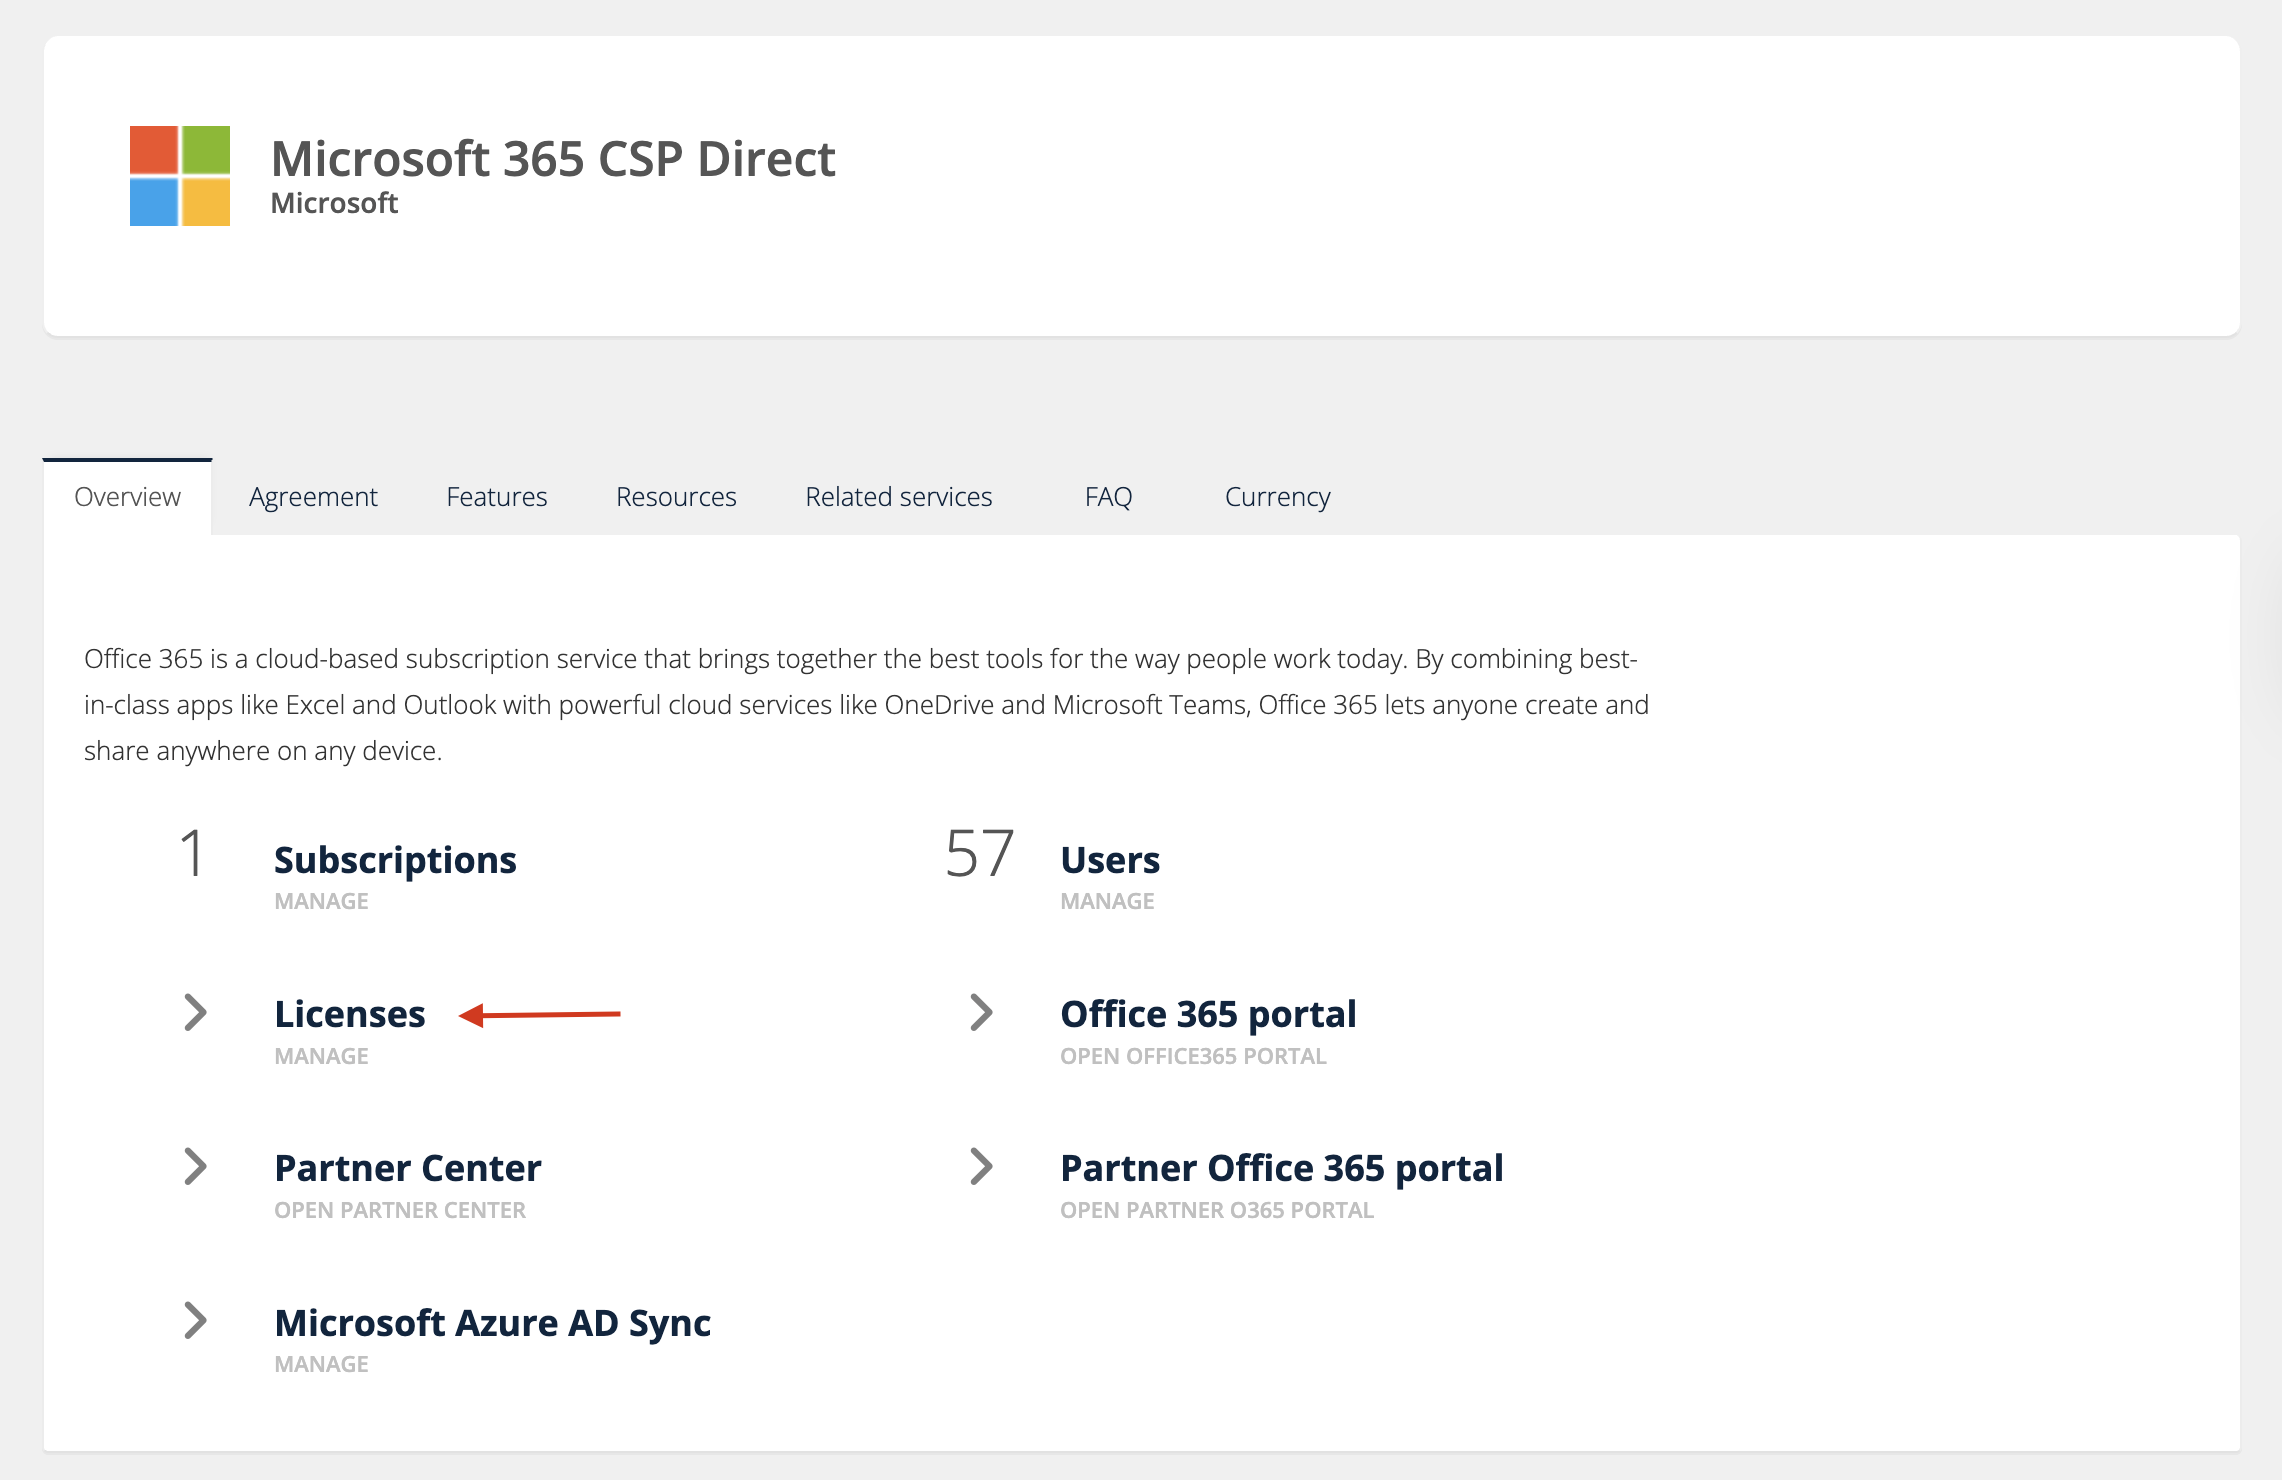
-
Click on Licenses
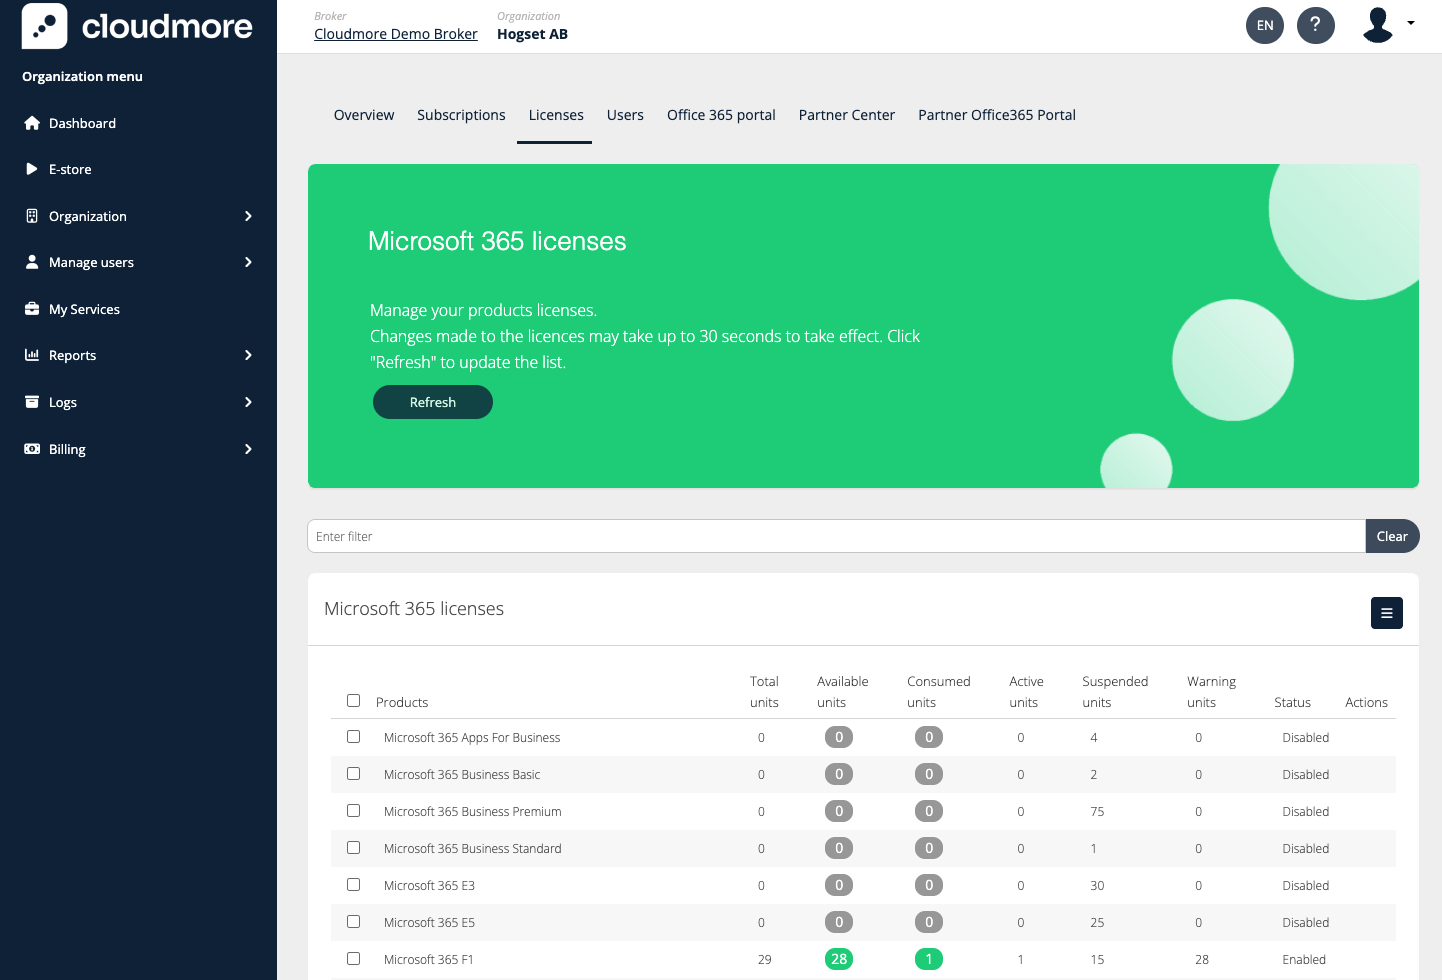
This provides information regarding the licenses available, assigned, suspended, etc.
Assign License to a User
There are two ways to assign a license to a user.
-
From License Page:
-
Click on the Available Units count for the required product.
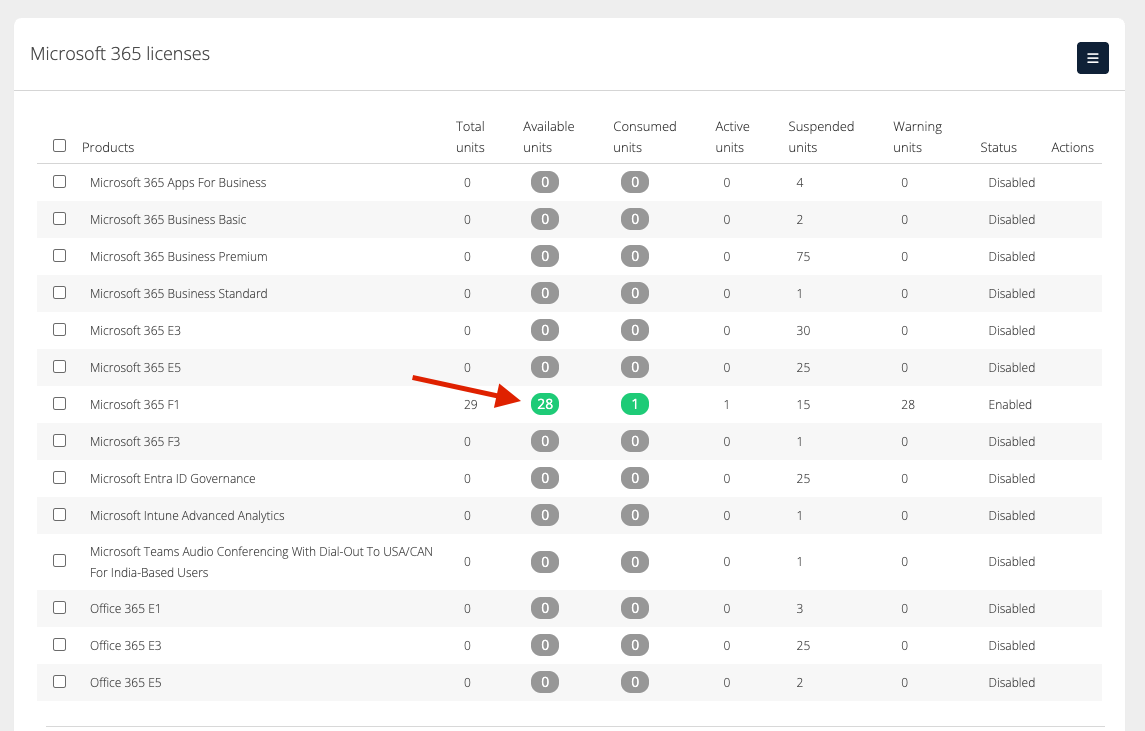
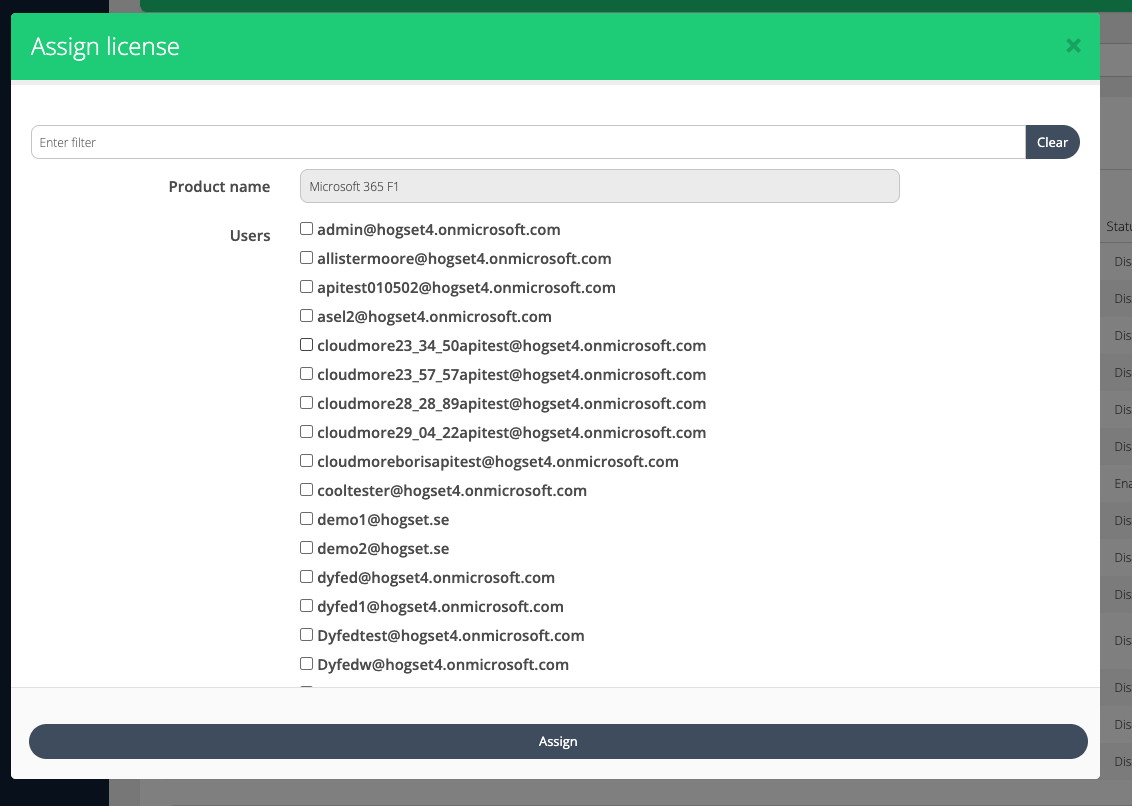
-
Select the users to whom you wish to assign the license, and click on Assign.
-
-
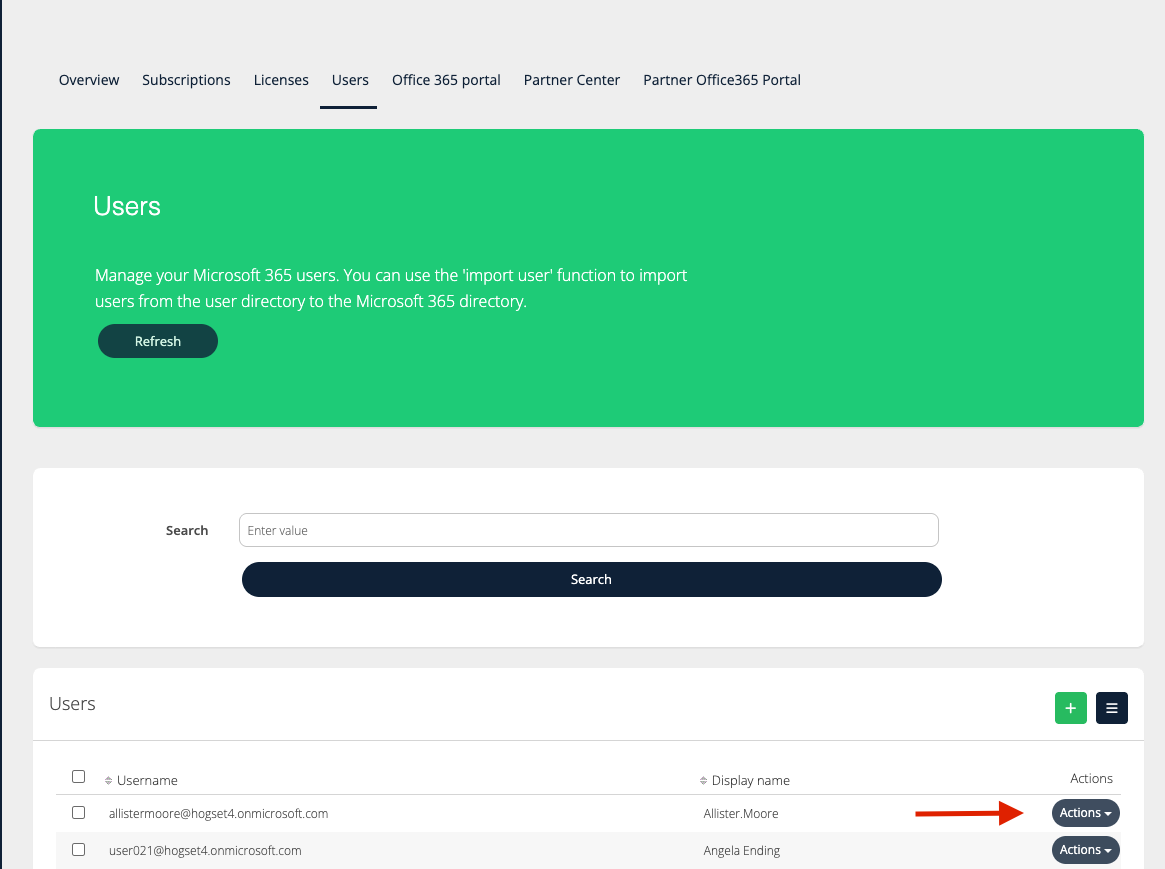
From Users Page:
-
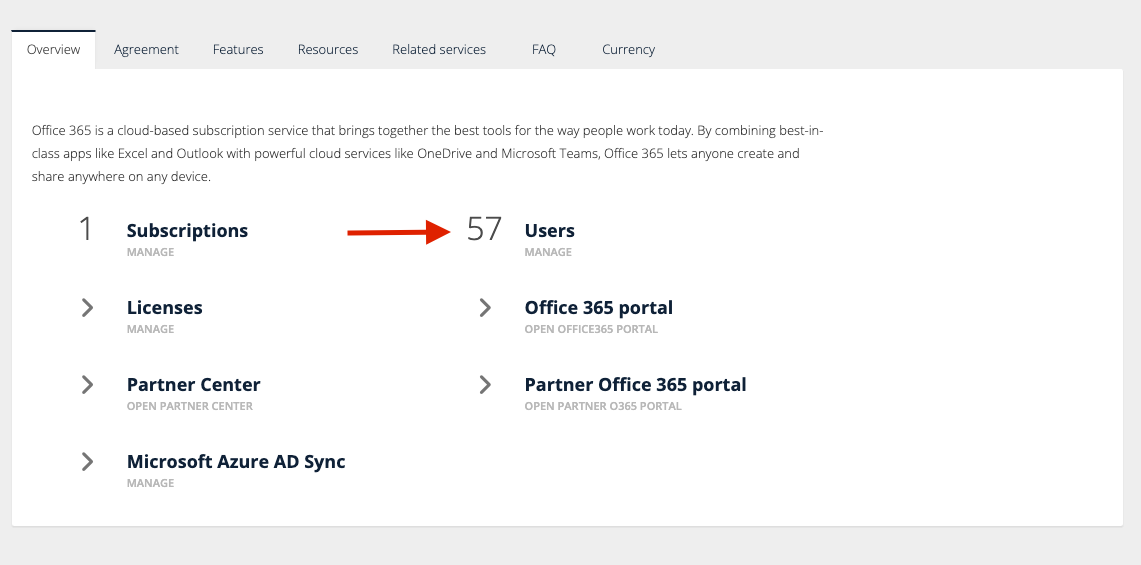
Navigate to the Users option from the Overview page OR the Users tab from the license page.
-
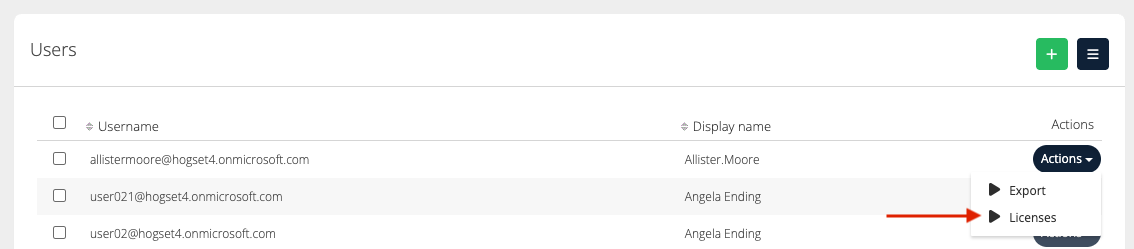
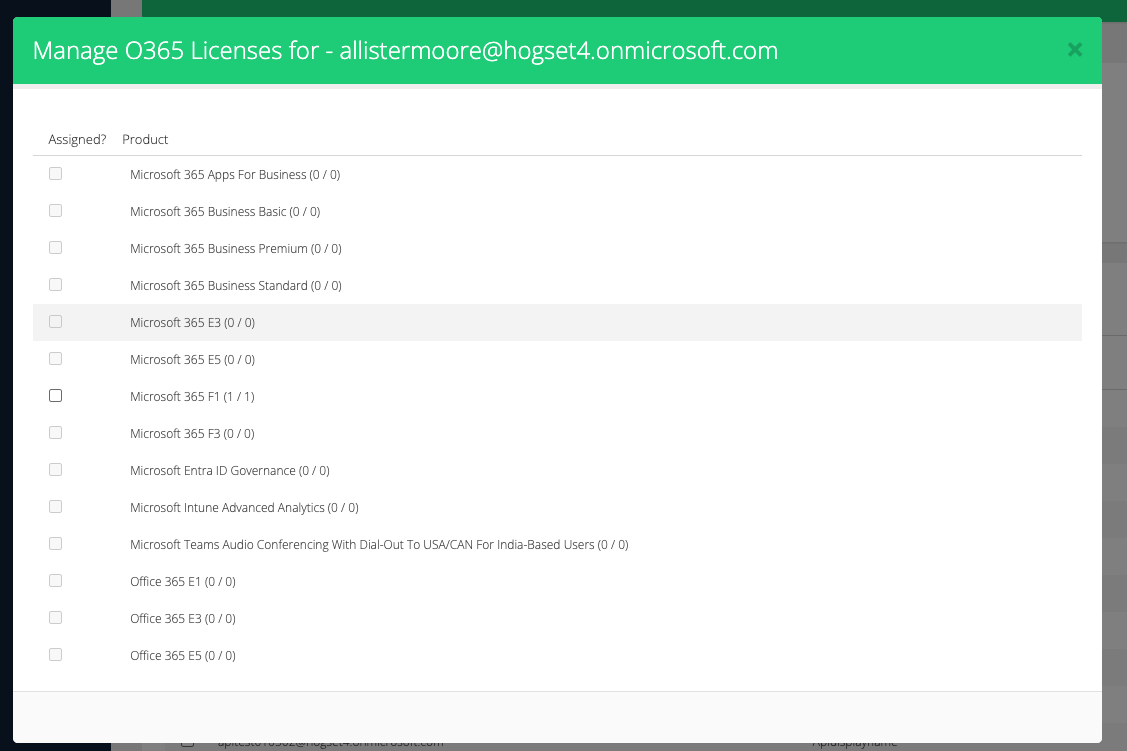
Click on Actions > Licenses for the user to whom you wish to assign a license.
-
Click on the product to which you wish to assign the licence.
-