Overview
Cloudmore provides automated email notifications for various events to help organizations stay informed about service changes and renewals.
As a Broker, you can configure automated email notifications to keep your organizations informed about key service events and renewals.
Setting up these notifications ensures proactive communication, helping organizations take timely action to manage their services efficiently.
Creating an Email Notification Template
The first step before setting up custom notifications is to create templates for them.
To create an email notification template, the following steps have to be done.
-
Log in to Cloudmore.
-
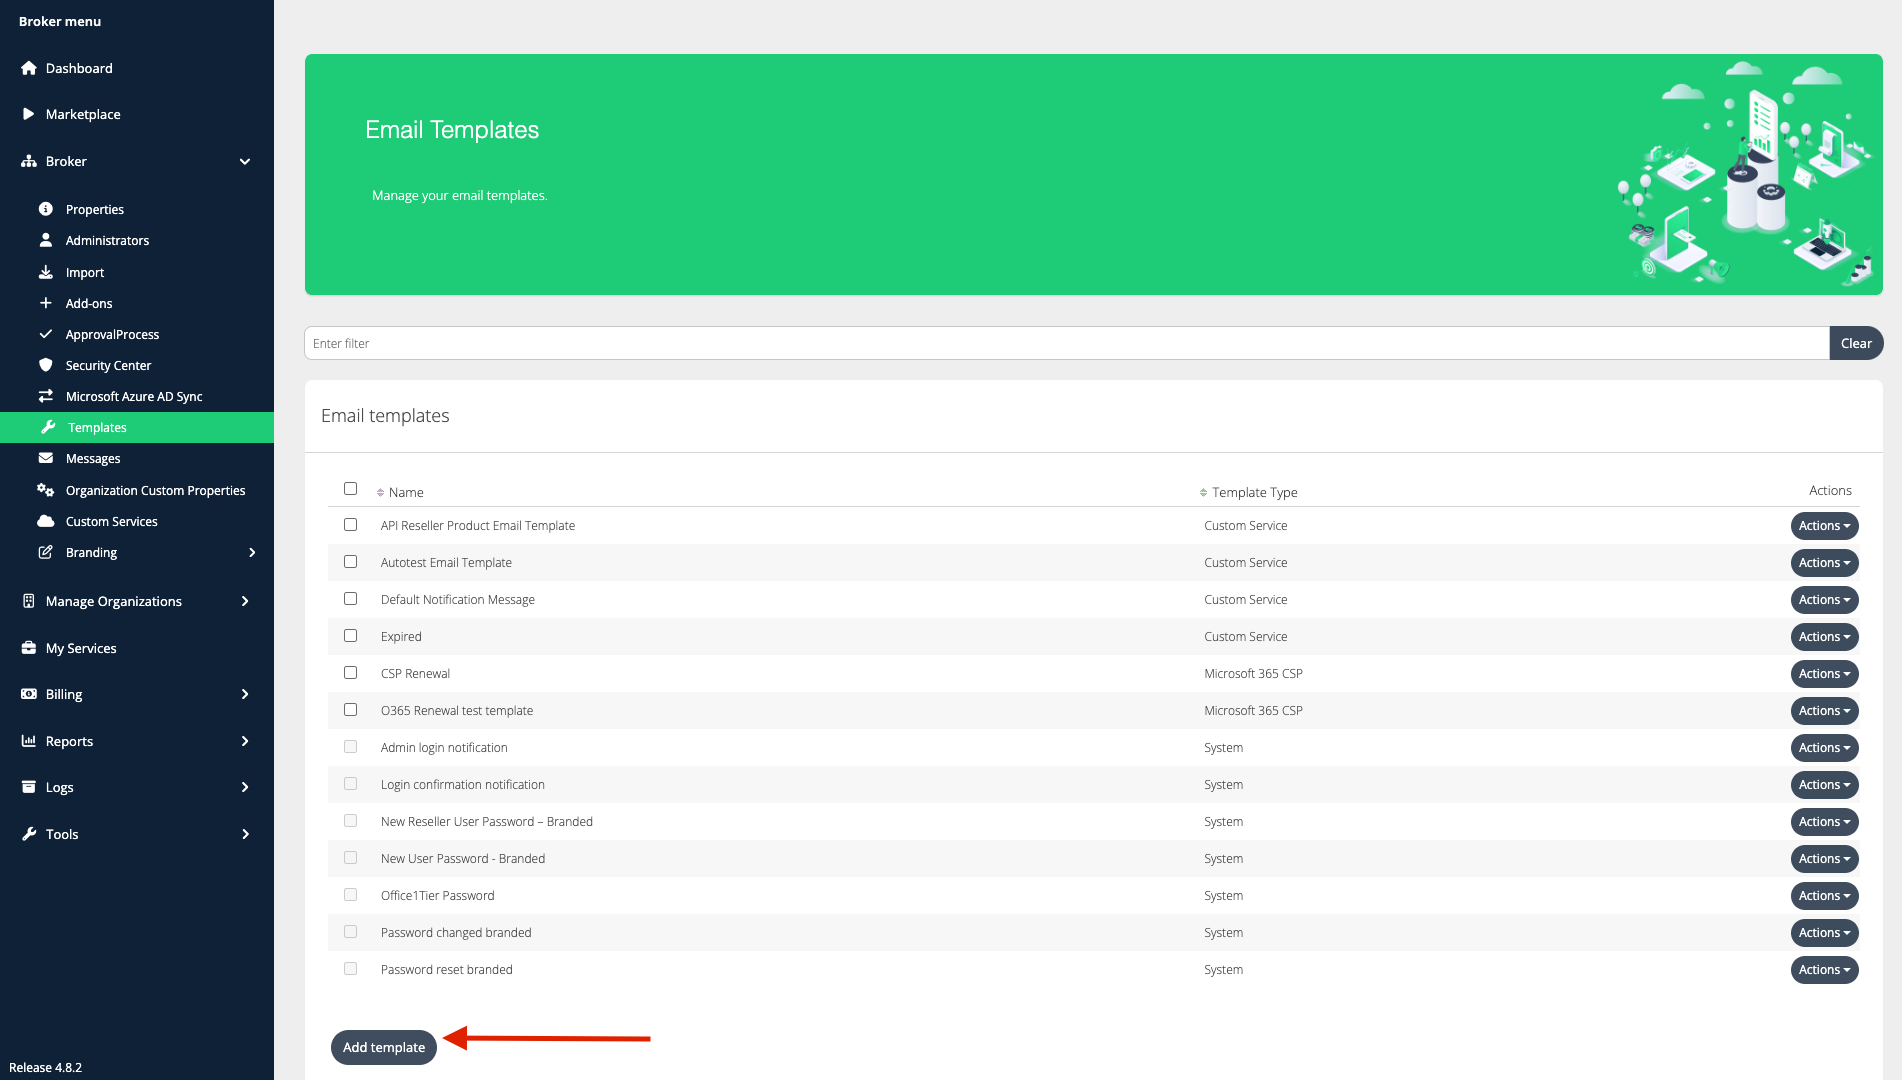
Navigate to Broker > Templates > Add Template.
-
Choose a Template Type - Select the template depending on the type of service it will cater to, i.e., Custom Service or Microsoft 365 CSP.
-
Assign a Template Name for easy identification.
-
Provide a Description outlining the purpose of the template.
-
Define a Subject Line for the email.
-
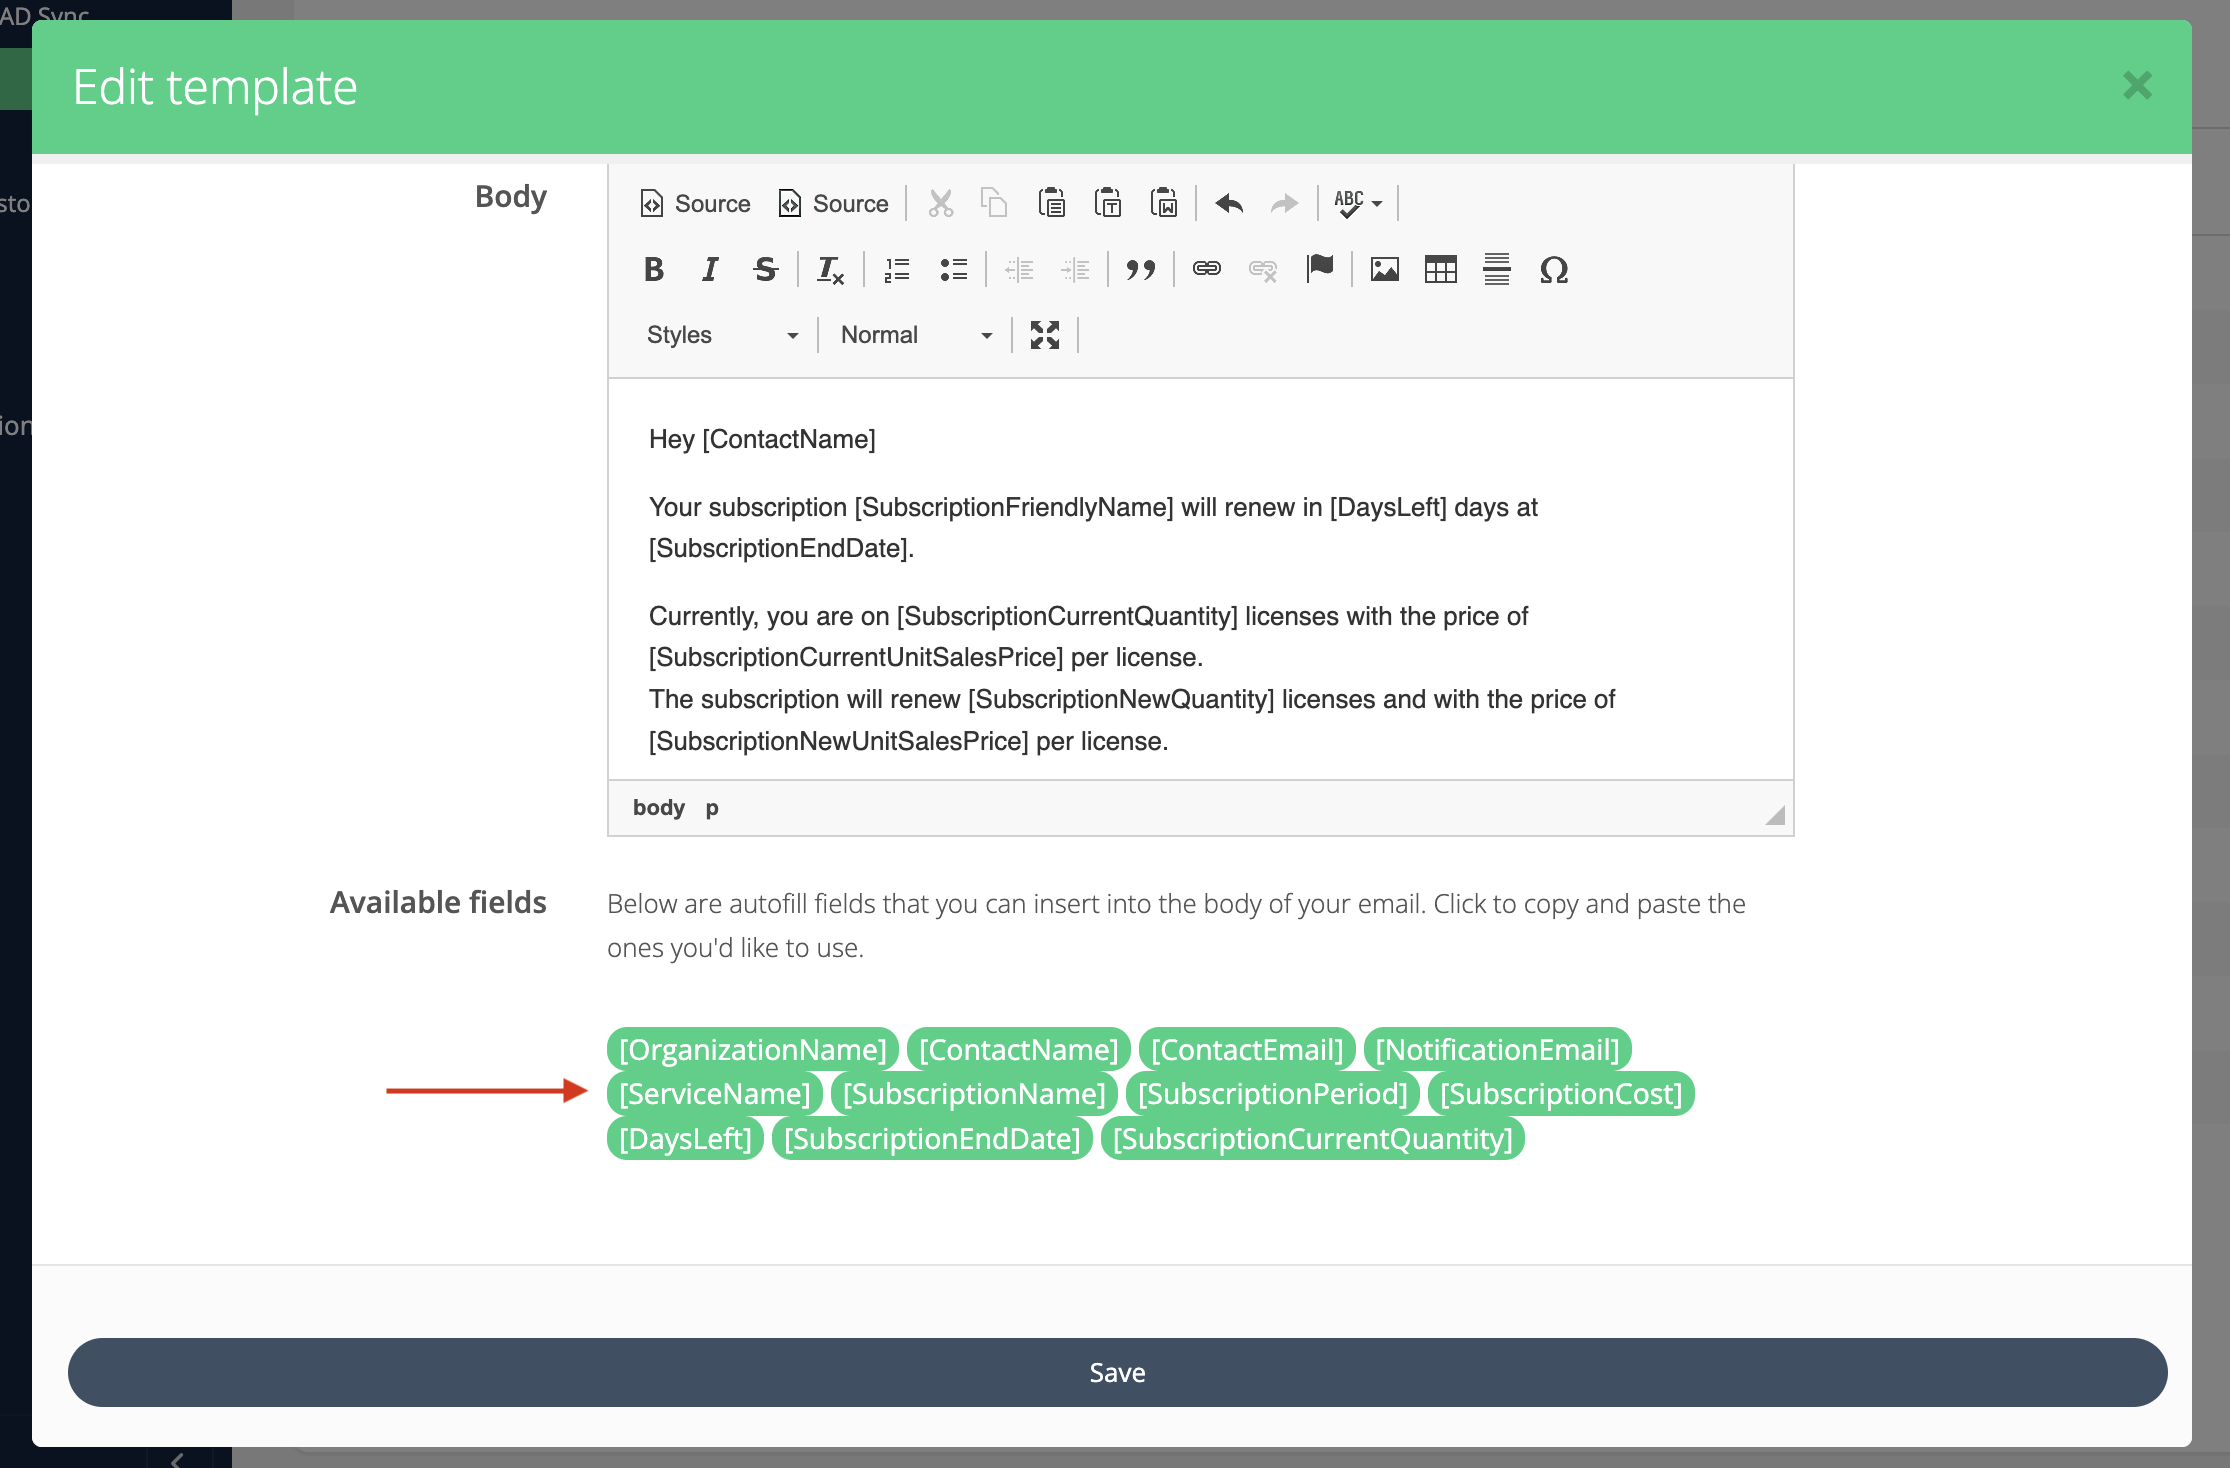
Craft the Body, utilizing text and dynamic tags, which can be selected from the available list to personalize messages.
|
Field description |
Microsoft 365 CSP Direct tag |
Custom Service tag |
|---|---|---|
|
Name of the organization |
[OrganizationName] |
[OrganizationName] |
|
Full name of the contact person |
[ContactName] |
[ContactName] |
|
Email of the contact person |
[ContactEmail] |
[ContactEmail] |
|
The general organization’s notification email |
[NotificationEmail] |
[NotificationEmail] |
|
Name of the service |
[ServiceName] |
[ServiceName] |
|
Subscription’s friendly/display name |
[SubscriptionFriendlyName] |
[SubscriptionName] |
|
Billing period (monthly/annual) |
[SubscriptionPeriod] |
[SubscriptionPeriod] |
|
Current total sales price |
[SubscriptionCurrentTotalSalesPrice] |
[SubscriptionCost] |
|
New total sales price (after change) |
[SubscriptionNewTotalSalesPrice] |
- |
|
New unit price per license (after change) |
[SubscriptionNewUnitSalesPrice] |
- |
|
Current subscription quantity |
[SubscriptionCurrentQuantity] |
[SubscriptionCurrentQuantity] |
|
New subscription quantity (after change) |
[SubscriptionNewQuantity] |
- |
|
Days left until renewal/expiry |
[DaysLeft] |
[DaysLeft] |
|
Subscription end/renewal date |
[SubscriptionEndDate] |
[SubscriptionEndDate] |
|
Current unit price per license |
[SubscriptionCurrentUnitSalesPrice] |
- |
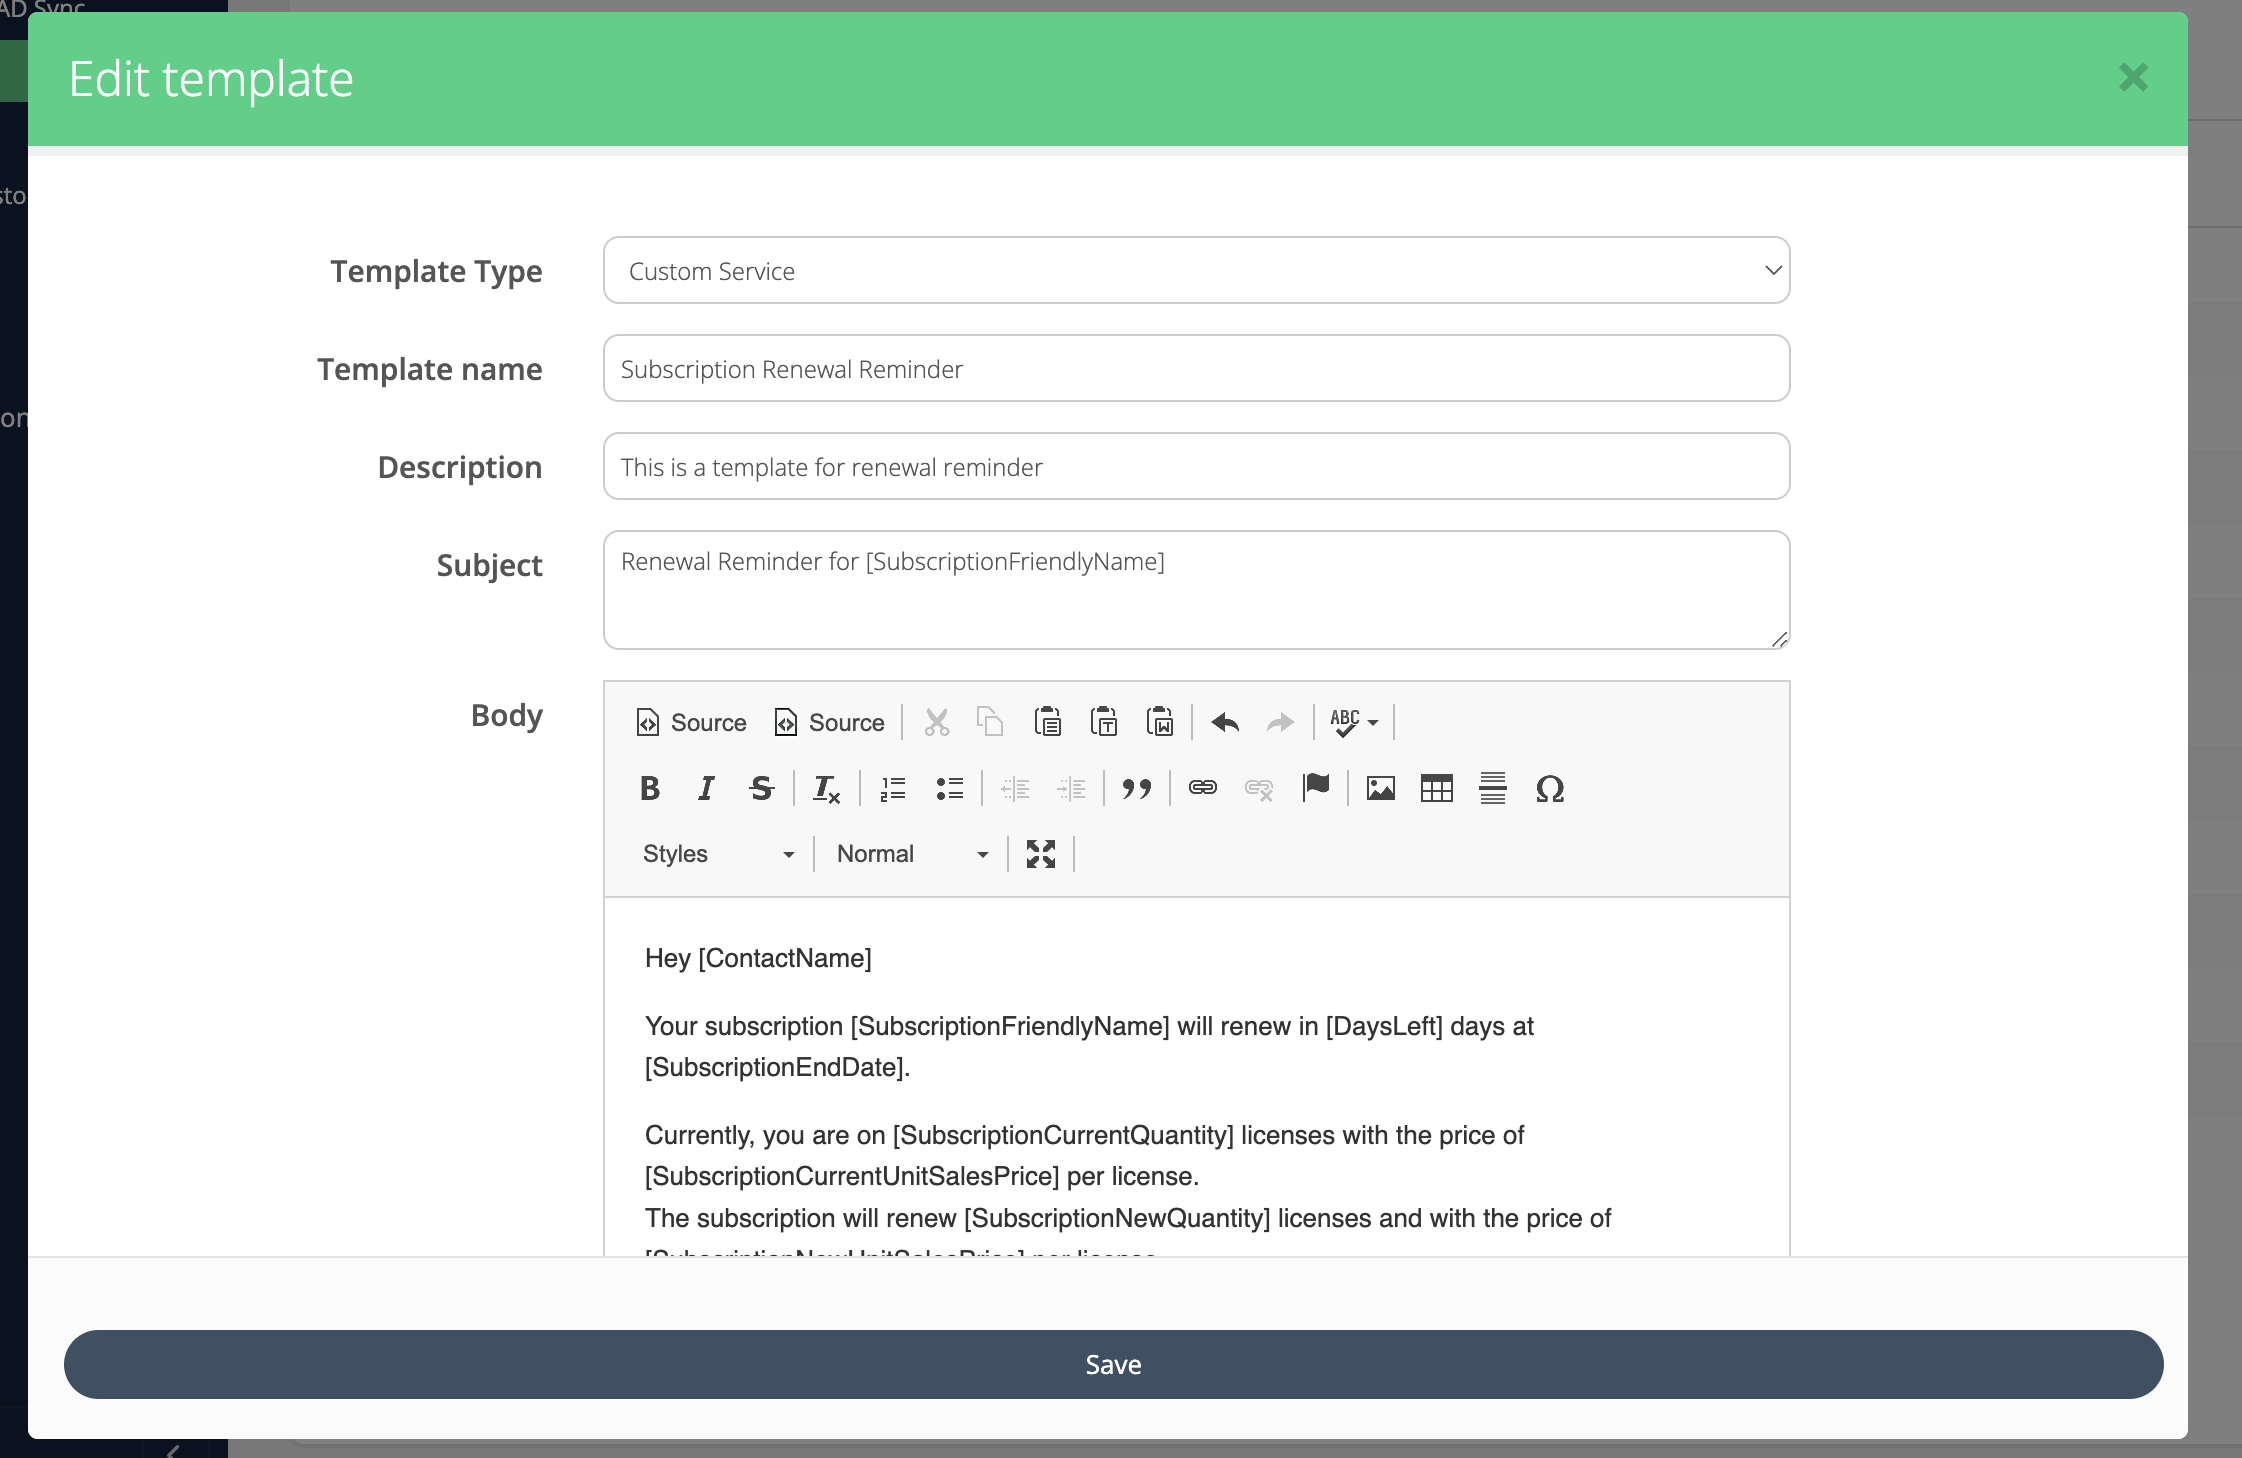
Template Details
-
Template Type: Choose a service from the dropdown.
-
Template Name: Enter a name to identify your template.
-
Description: Provide details about the template’s purpose and specifications.
-
Subject: This will be the subject line in the notification email.
-
Body: Write the main email content. Use available fields to insert dynamic data.
-
Click Save to finalize the template.
These templates can now be used for various events to trigger emails at different stages.
Personalize Notifications
-
By default, Cloudmore sends all notifications from
noreply@cloudmore.com. -
However, for a more personalized and branded experience, you can customize the sender domain using Cloudmore's white labeling feature.
-
This allows emails to appear as if they are coming directly from your domain, maintaining brand consistency in customer communications.
-
For setup details, refer to the White Labeling Documentation.
Event notifications
This type of notification is triggered when a specific set of events occurs on the platform. These events are described below.
User logs in
A security measure that informs users when a login occurs. These notifications can be managed under the Security Center.
Organization Adds a Service
Keep organizations informed when they subscribe to a new service.
-
Custom Service is added: To set up this notification for a service,
-
Navigate to Broker > Custom Services.
-
Click on edit service and select the checkbox “Organization adds service,”.
-
Select the required template.

-
The notification email based on the selected template is sent to the organization.
-
Microsoft CSP Service is added - To configure this notification for a service,
-
Navigate to Broker > My Services.
-
Find the Microsoft CSP service.
-
Click on settings and check the "Organization adds service" box.
-
Select the appropriate template.

-
The notification email based on the selected template is sent to the organization.
Organization Adds a Subscription
Notify organizations when they activate new subscriptions.
-
Custom Service subscription is added - To configure this notification for a service,
-
Navigate to Broker > Custom Services > Actions > Products.
-
Select the product for which you want to add a notification by clicking on Action > Properties.
-
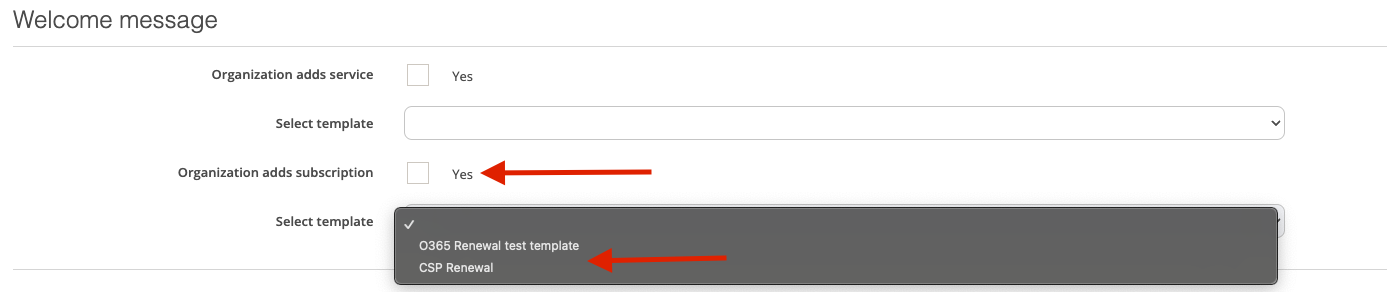
Check the “Organization adds subscription” and select the appropriate template.

Select to view products of a custom service

-
The notification email based on the selected template is sent to the organization.
-
Microsoft CSP subscription is added - To configure this notification for a service,
-
Navigate to Broker > My Services.
-
Find the Microsoft CSP service and click on settings
-
Check the "Organization adds subscription" box.
-
Select the appropriate template.
-
The notification email based on the selected template is sent to the organization.
Subscription is about to renew
Help organizations avoid service interruptions by setting up timely reminders before subscription expiration.
-
Custom Service subscription renewal - To configure this notification for a service,
-
Navigate to Broker > Custom Services > Actions > Products.
-
Select the product for which you want to add a notification by selecting the properties. There are options available to
-
Send a notification “X” days before the renewal.

-
Send notifications after expiration

-
-
The notification email based on the selected template is sent to the organization.
-
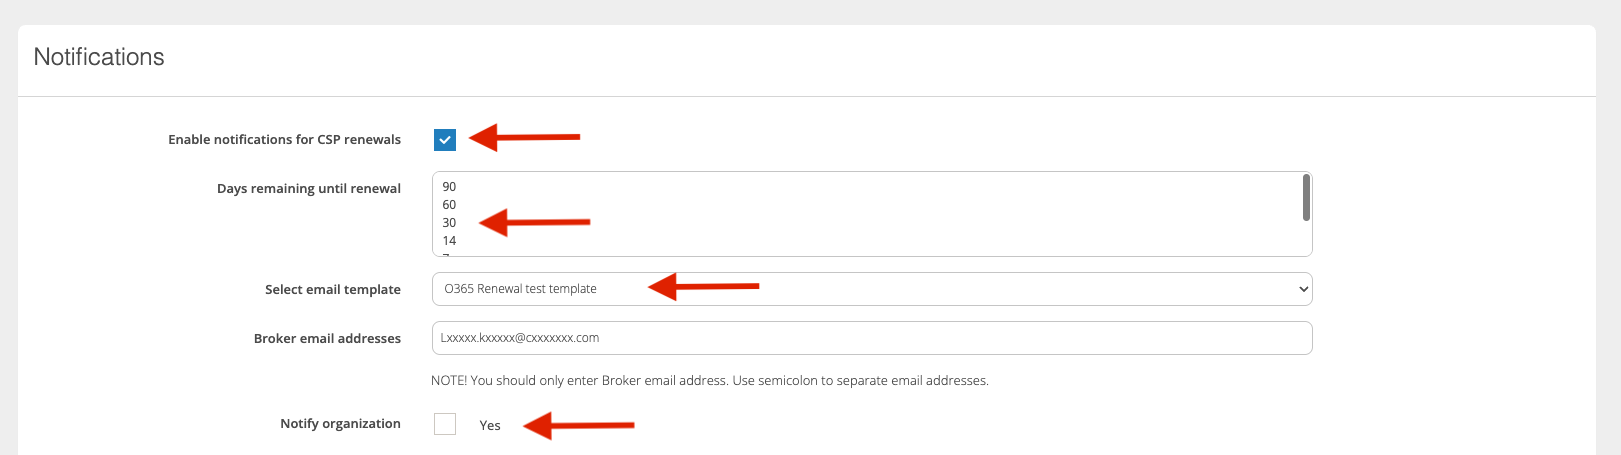
Microsoft CSP Service subscription renewal - To configure this notification,
-
Navigate to Broker > My Services > Microsoft O365 CSP Direct > Settings.
-
Choose the "Enable notifications for CSP renewals”.
-
Enable notification for CSP renewal.
-
Select one option from the range of Days left before the subscription ends to automatically send the notification email.
-
Following the template creation step, select the email template created from the dropdown options.
-
Enter the email address of the recipients within the Broker who will receive the notification email.
-
Select the Notify Organization box to send the notification email to the Notification email address entered in the organization profile screen.
-
Click on Update
-
The notification emails are sent to the brokers whose emails are listed on the screen and to the email address entered in the organization profile screen (if notify organization is selected).
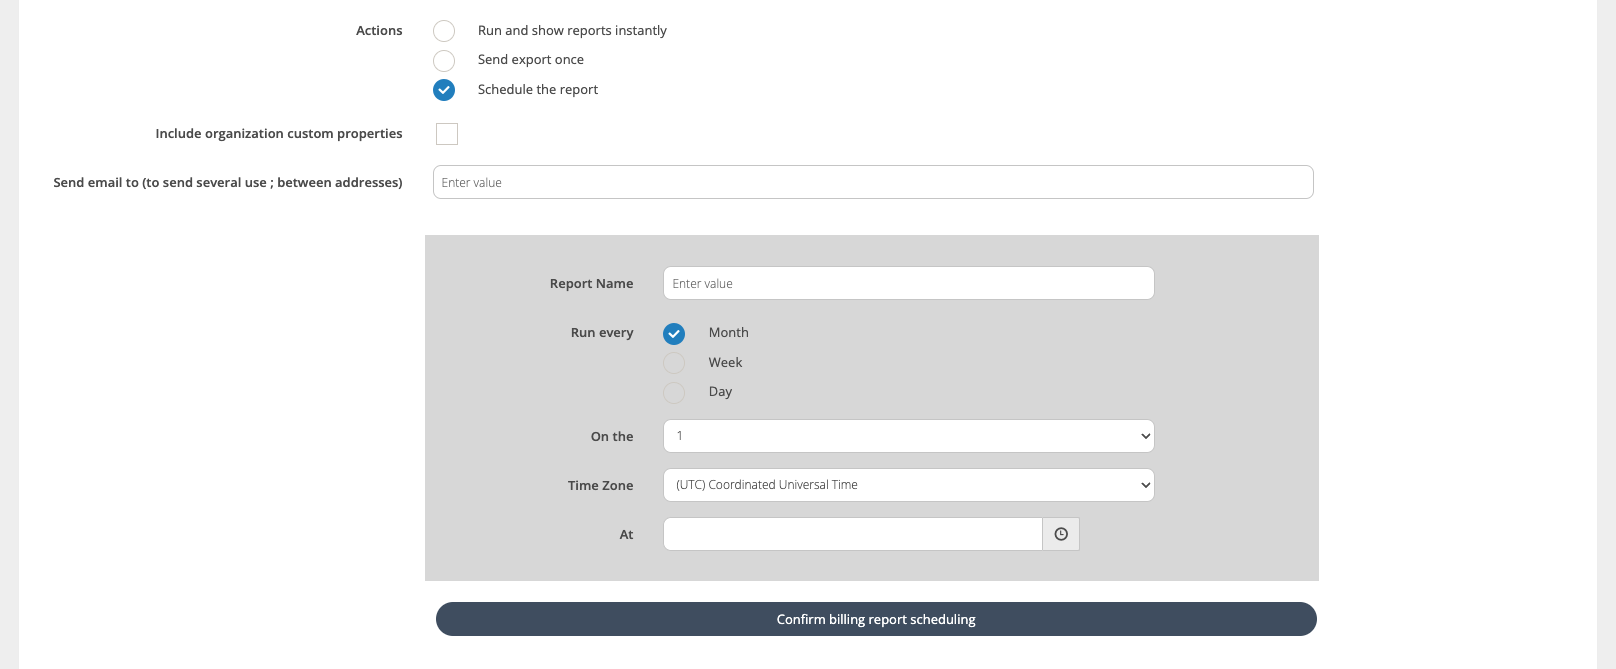
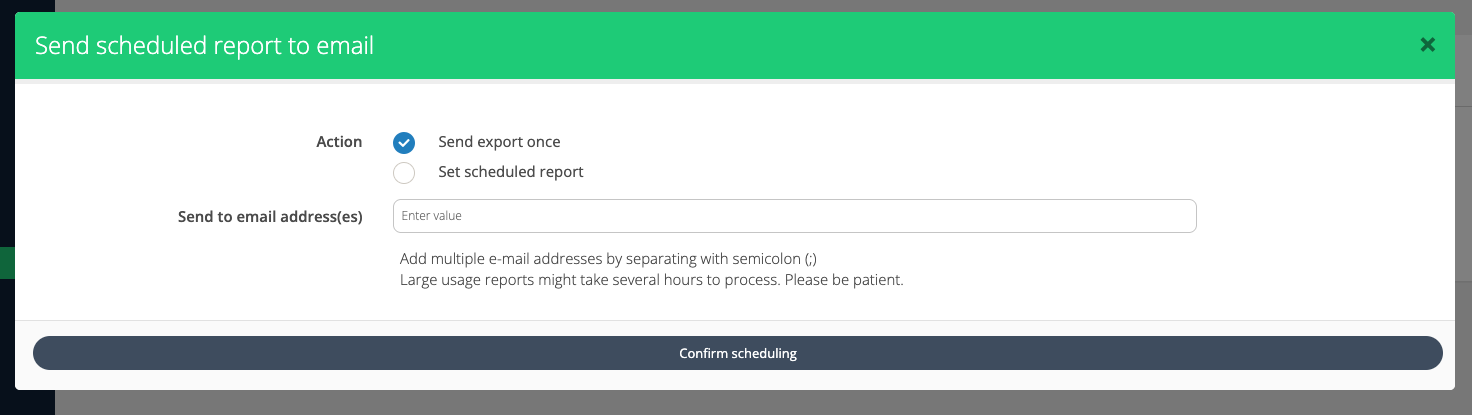
Recurring email reports
You can set up recurring reports to be delivered automatically to your email every day, every week, or every month. Here are some of the different reports that can be scheduled:
-
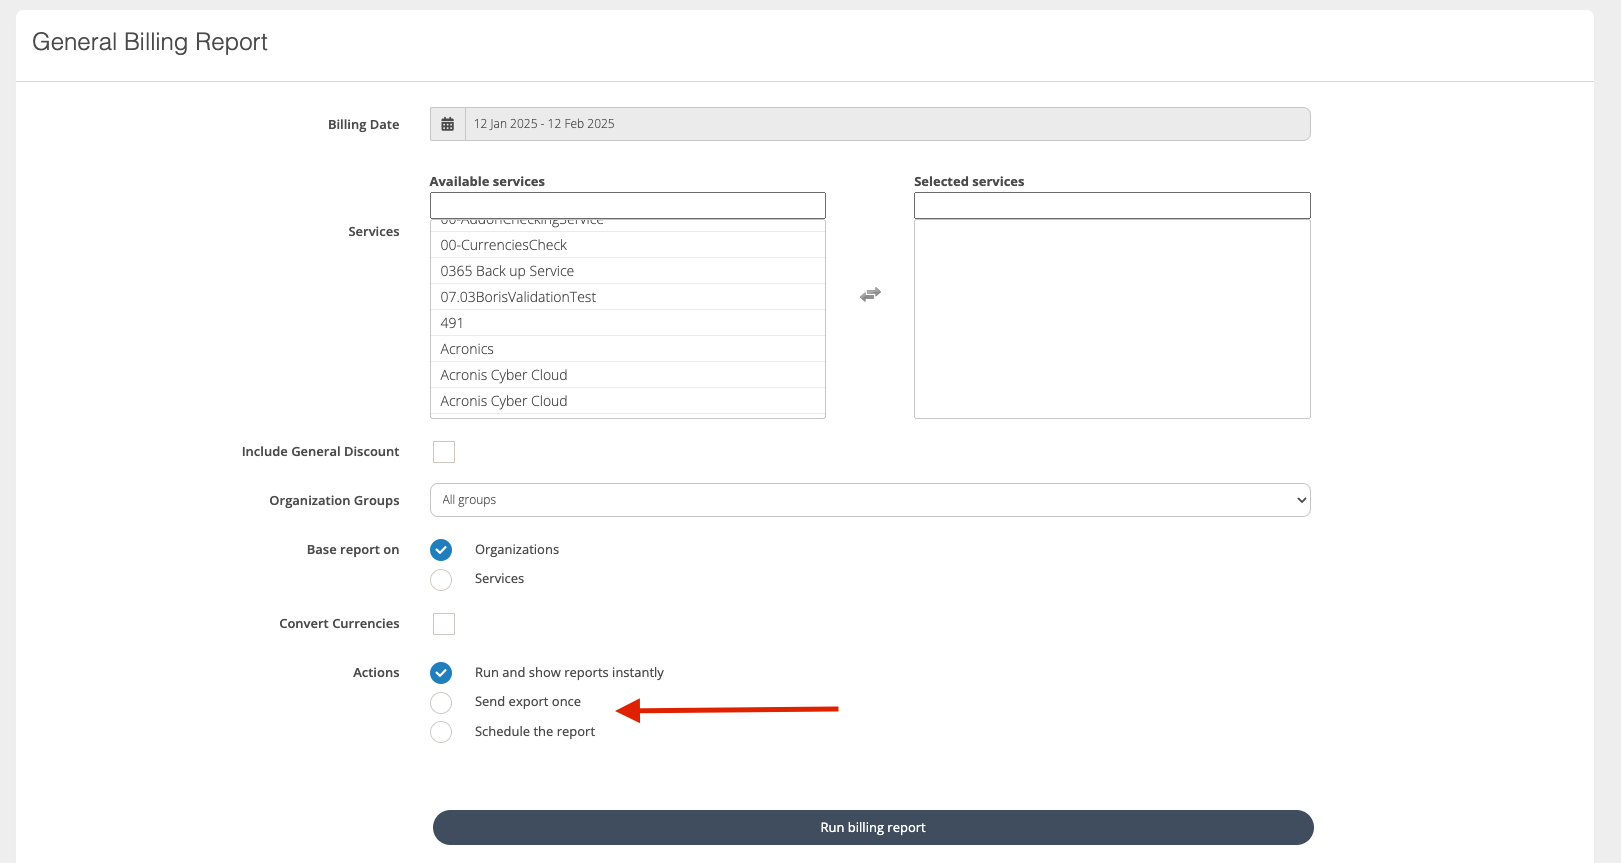
General Billing Report - The billing report is the latest billing and product pricing data, allowing you to filter by billing period and relevant services. This can be configured to send once or scheduled periodically as per your needs.
The notification emails are sent to the selected individuals on the screen.
-
Microsoft 365 Legacy billing report - You can schedule your Microsoft 365 Legacy subscription billing report to be sent to your email periodically. This ensures you receive the latest billing information automatically when Microsoft billing is published.

The notification emails are sent to the selected individuals on the screen.
-
Subscription Renewal Reports - You can schedule your upcoming subscription renewals report to be sent to your email periodically, ensuring you stay updated on all upcoming subscription renewals automatically.
The report emails are sent to the selected individuals on the screen

-
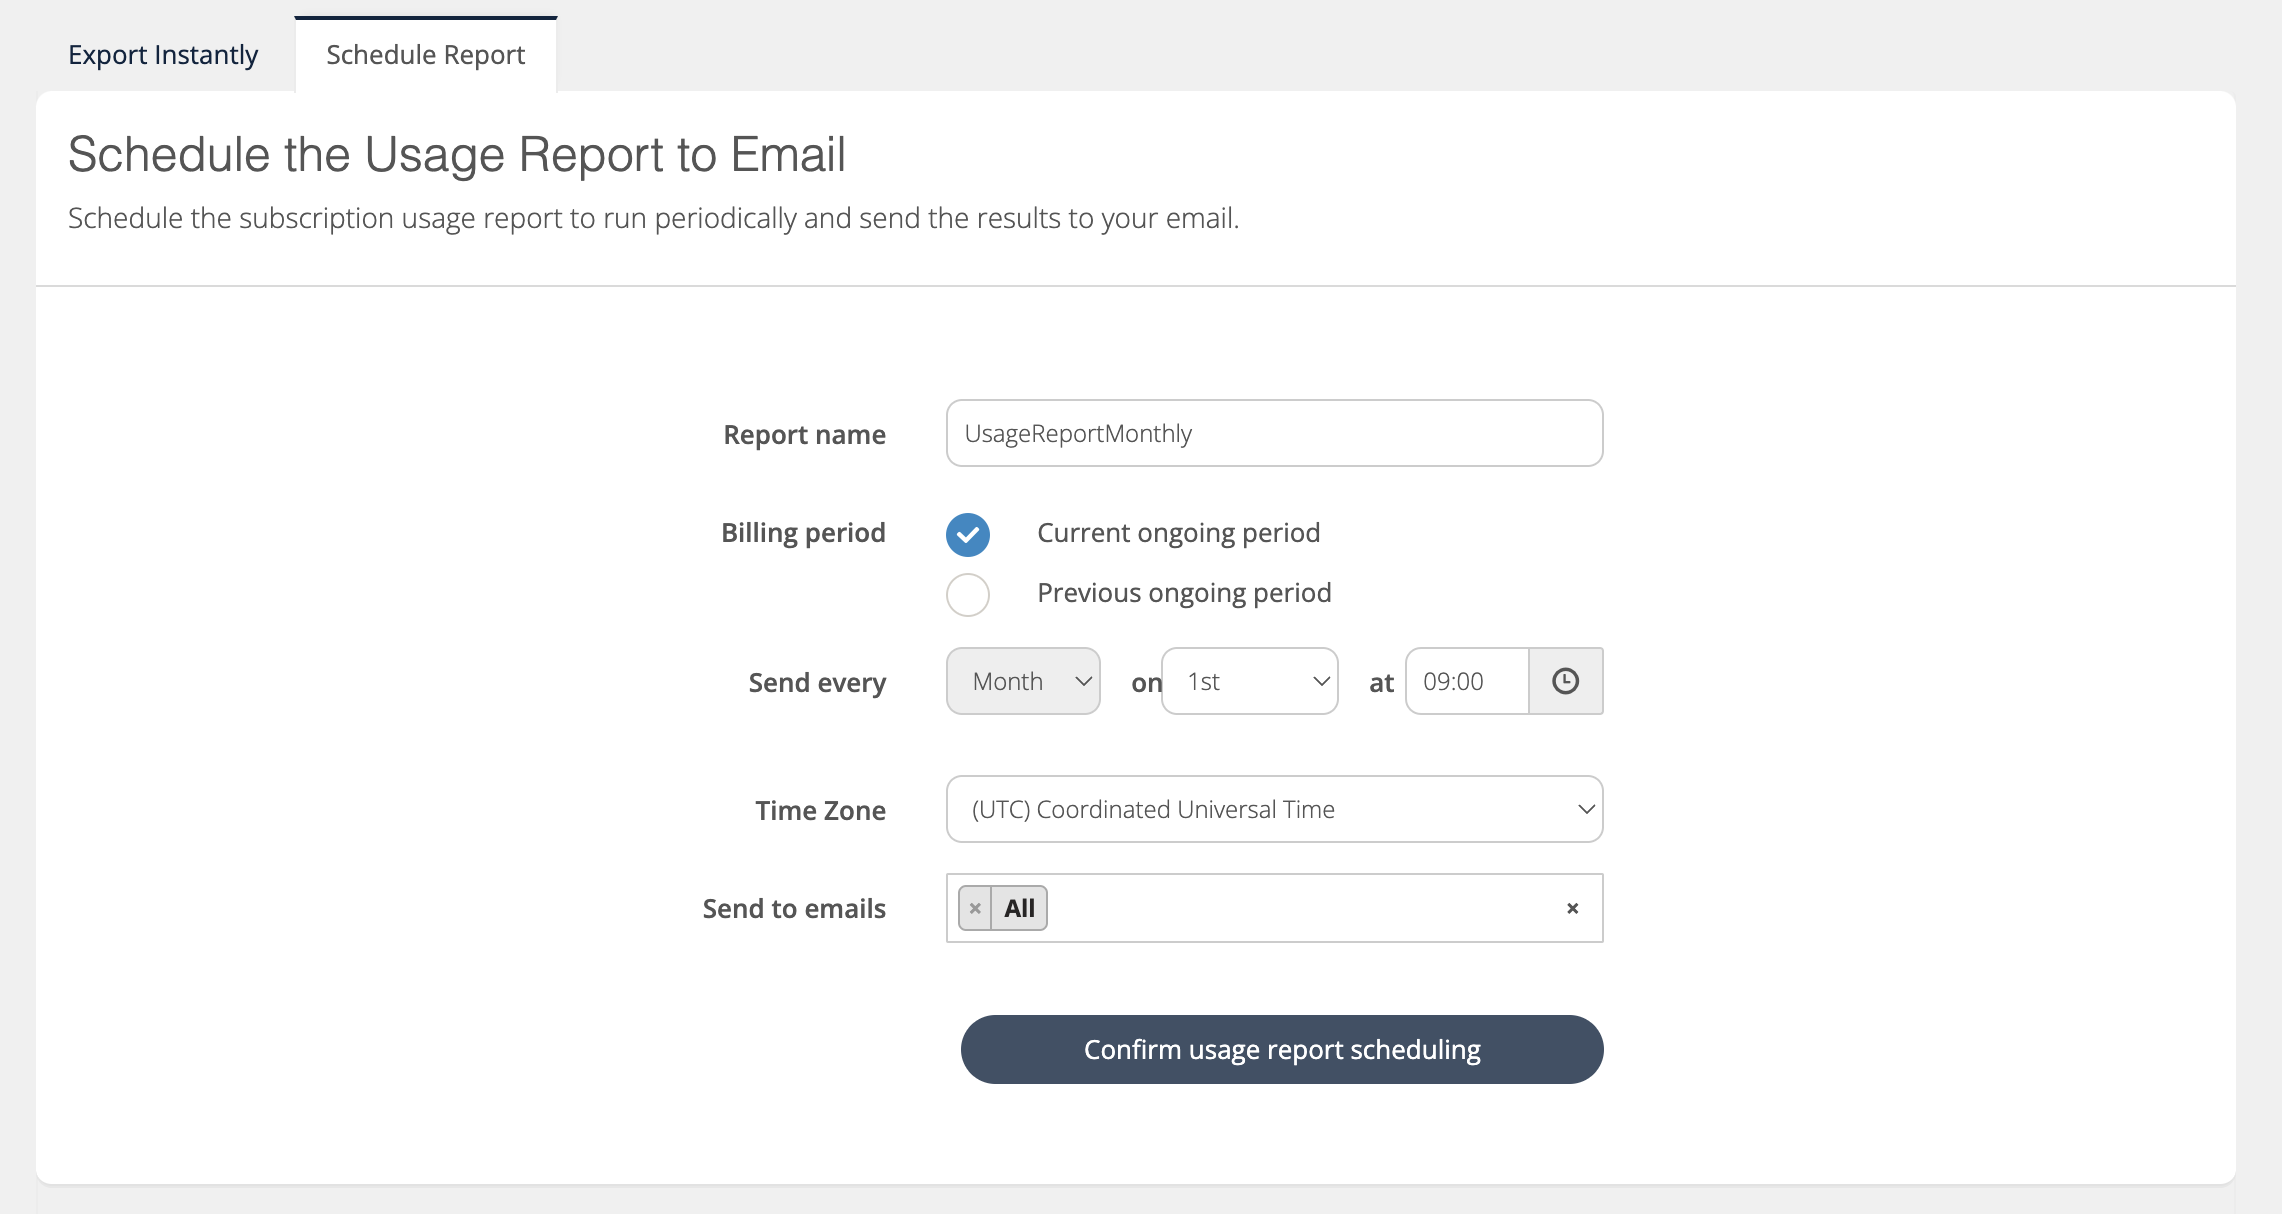
Microsoft Usage Reports - You can schedule your Microsoft Usage report to be sent to your email periodically. This is primarily intended for Organization users. However, Broker users can also add their emails to receive Usage Reports for key organizations. This feature can be particularly useful for Key Account Managers.
The report emails are sent to the selected individuals on the screen